 RocketMQ 整合spring boot
文档基于 RocketMQ-4.7.1
# 添加依赖
<dependency>
    <groupId>org.apache.rocketmq</groupId>
    <artifactId>rocketmq-spring-boot-starter</artifactId>
    <exclusions>
        <exclusion>
            <groupId>org.apache.rocketmq</groupId>
            <artifactId>rocketmq-client</artifactId>
        </exclusion>
    </exclusions>
</dependency>

<dependency>
    <groupId>org.apache.rocketmq</groupId>
    <artifactId>rocketmq-client</artifactId>
    <version>4.7.1</version>
</dependency>
1
2
3
4
5
6
7
8
9
10
11
12
13
14
15
16
2
3
4
5
6
7
8
9
10
11
12
13
14
15
16
这里一定要注意版本问题,我安装的是 4.7.1 但 rocketmq-spring-boot-starter 默认是 4.4.0,导致我消费一直不成功。
# 修改配置
server:
  port: 8888

rocketmq:
  name-server: 10.240.30.102:9876;10.240.30.100:9876
  producer:
    group: my-group1
    sendMessageTimeout: 300000


logging:
  level:
    root: error
    com.giant.cloud: debug
1
2
3
4
5
6
7
8
9
10
11
12
13
14
2
3
4
5
6
7
8
9
10
11
12
13
14
# 生产者代码
import lombok.extern.slf4j.Slf4j;
import org.apache.rocketmq.client.exception.MQClientException;
import org.apache.rocketmq.spring.core.RocketMQTemplate;
import org.springframework.boot.CommandLineRunner;
import org.springframework.boot.SpringApplication;
import org.springframework.boot.autoconfigure.SpringBootApplication;
import javax.annotation.Resource;

@SpringBootApplication
@Slf4j
public class RocketApplication implements CommandLineRunner {

    @Resource
    private RocketMQTemplate rocketMQTemplate;


    public static void main(String[] args) {
        SpringApplication.run(RocketApplication.class, args);
    }

    @Override
    public void run(String... args) throws MQClientException {
        String topic = "stringRequestTopic";
        // 应该叫 renewTopic 找到已有的topic 替换成一个新的topic
        // rocketMQTemplate.getProducer().createTopic("aa",topic,4);
        // 设置 VipChannel 为不启用
        rocketMQTemplate.getProducer().setVipChannelEnabled(false);
        rocketMQTemplate.syncSend(topic, "Hello, World!");
    }

}
1
2
3
4
5
6
7
8
9
10
11
12
13
14
15
16
17
18
19
20
21
22
23
24
25
26
27
28
29
30
31
2
3
4
5
6
7
8
9
10
11
12
13
14
15
16
17
18
19
20
21
22
23
24
25
26
27
28
29
30
31
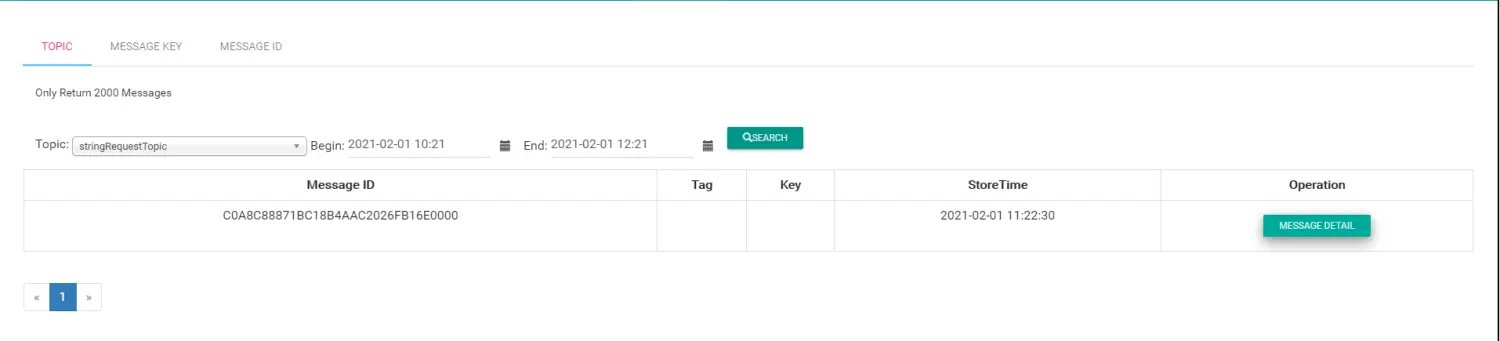
发送成功后会查到这条消息
# 消费消息
import lombok.extern.slf4j.Slf4j;
import org.apache.rocketmq.spring.annotation.RocketMQMessageListener;
import org.apache.rocketmq.spring.core.RocketMQListener;
import org.springframework.stereotype.Service;

/**
 * @author big uncle
 * @date 2021/2/1 11:30
 * @module
 **/
@Service
@Slf4j
@RocketMQMessageListener(topic = "stringRequestTopic", consumerGroup = "consumer-my-group1",enableMsgTrace = false)
public class StringMessage implements RocketMQListener<String> {


    @Override
    public void onMessage(String message) {
        log.debug("接收消息为:{}",message);
    }
}
1
2
3
4
5
6
7
8
9
10
11
12
13
14
15
16
17
18
19
20
21
2
3
4
5
6
7
8
9
10
11
12
13
14
15
16
17
18
19
20
21
# 高级消费模式
更多更灵活的消费方式 (opens new window),样例代码如下
package com.giant.cloud;

import lombok.extern.slf4j.Slf4j;
import org.apache.rocketmq.client.consumer.DefaultMQPushConsumer;
import org.apache.rocketmq.client.consumer.listener.ConsumeConcurrentlyContext;
import org.apache.rocketmq.client.consumer.listener.ConsumeConcurrentlyStatus;
import org.apache.rocketmq.client.consumer.listener.MessageListenerConcurrently;
import org.apache.rocketmq.common.message.Message;
import org.apache.rocketmq.common.message.MessageExt;
import org.apache.rocketmq.common.protocol.heartbeat.MessageModel;
import org.apache.rocketmq.spring.core.RocketMQTemplate;
import org.springframework.boot.CommandLineRunner;
import org.springframework.boot.SpringApplication;
import org.springframework.boot.autoconfigure.SpringBootApplication;

import javax.annotation.Resource;
import java.util.ArrayList;
import java.util.List;

@SpringBootApplication
@Slf4j
public class RocketApplication implements CommandLineRunner {

    @Resource
    private RocketMQTemplate rocketMQTemplate;


    public static void main(String[] args) {
        SpringApplication.run(RocketApplication.class, args);
    }

    String topic = "stringRequestTopic";

    String consumerGroup = "consumer-my-group1";

    @Override
    public void run(String... args) throws Exception {
        product();
        consumer();
    }

    private void consumer() throws Exception {
        // 实例化消费者
        DefaultMQPushConsumer consumer = new DefaultMQPushConsumer(consumerGroup);
        // 服务地址
        consumer.setNamesrvAddr(rocketMQTemplate.getProducer().getNamesrvAddr());
        // 订阅Topics
        consumer.subscribe(topic, "*");
        consumer.setConsumeMessageBatchMaxSize(1000);
        consumer.setPullBatchSize(1000);
//        consumer.setPullInterval(5000);
        consumer.setMessageModel(MessageModel.CLUSTERING);
        consumer.setConsumeThreadMax(2);
        consumer.setConsumeThreadMin(2);
        // 注册消息监听者
        consumer.registerMessageListener(new MessageListenerConcurrently() {
            @Override
            public ConsumeConcurrentlyStatus consumeMessage(List<MessageExt> messages, ConsumeConcurrentlyContext context) {
                log.debug("消费线程为 {} , 获取到的消息量为 {}",Thread.currentThread().getName(),messages.size());
                return ConsumeConcurrentlyStatus.CONSUME_SUCCESS;
            }
        });
        // 启动消费者
        consumer.start();
    }

    private long product()  throws Exception{
        rocketMQTemplate.getProducer().setVipChannelEnabled(false);
        rocketMQTemplate.getProducer().setMaxMessageSize(4194304*10);
        log.debug("生产者组为:{}",rocketMQTemplate.getProducer().getProducerGroup());
        List<Message> messages = new ArrayList<>();
        for (int i=0;i<10000;i++) {
            String msg  = "h"+i;
            messages.add(new Message(topic, "", "", msg.getBytes()));
        }
        long startTime = System.currentTimeMillis();
        rocketMQTemplate.getProducer().send(messages);
        long time = System.currentTimeMillis() - startTime;
        log.debug("发送成功,耗时 {} ms",time);
        return time;
    }
}
1
2
3
4
5
6
7
8
9
10
11
12
13
14
15
16
17
18
19
20
21
22
23
24
25
26
27
28
29
30
31
32
33
34
35
36
37
38
39
40
41
42
43
44
45
46
47
48
49
50
51
52
53
54
55
56
57
58
59
60
61
62
63
64
65
66
67
68
69
70
71
72
73
74
75
76
77
78
79
80
81
82
2
3
4
5
6
7
8
9
10
11
12
13
14
15
16
17
18
19
20
21
22
23
24
25
26
27
28
29
30
31
32
33
34
35
36
37
38
39
40
41
42
43
44
45
46
47
48
49
50
51
52
53
54
55
56
57
58
59
60
61
62
63
64
65
66
67
68
69
70
71
72
73
74
75
76
77
78
79
80
81
82
# 注意
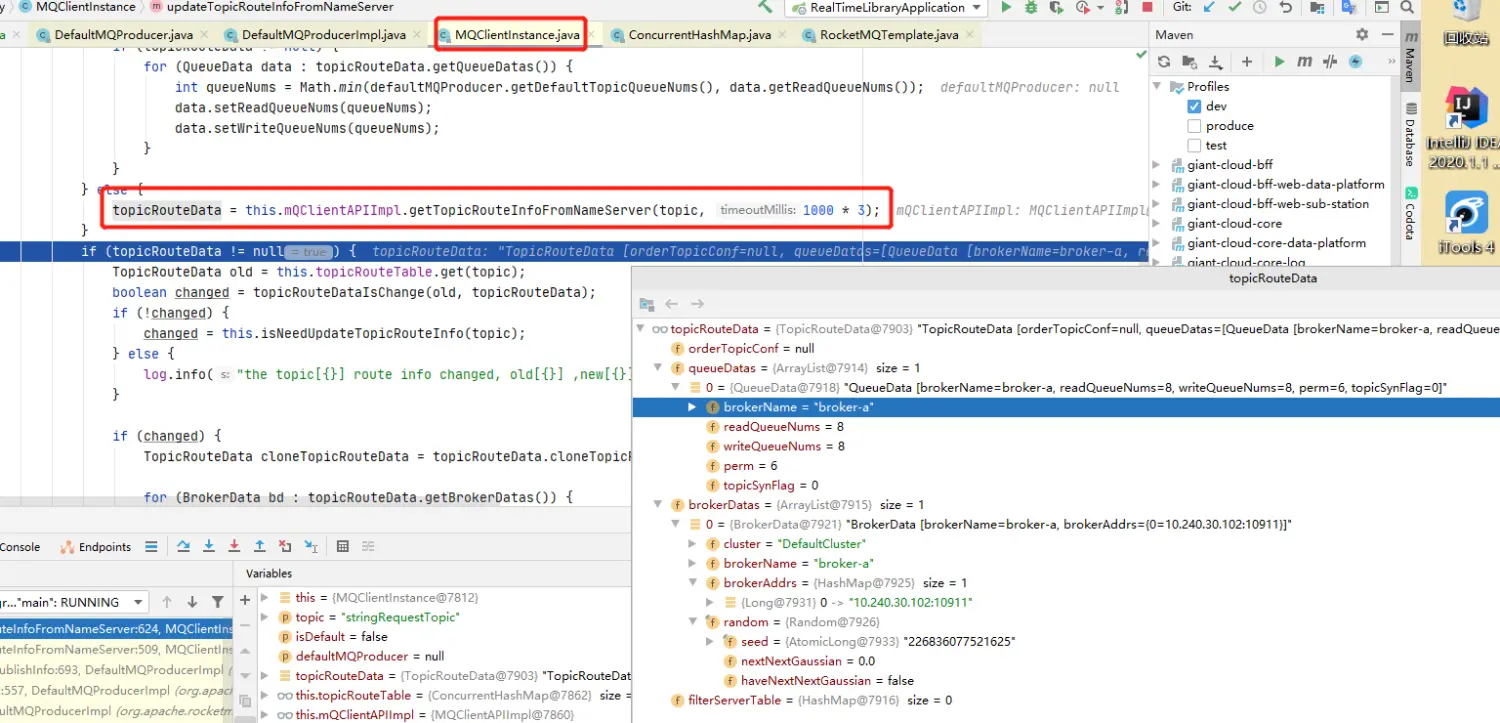
- 2m 模式下,发现消息只发送在 broker-a,没发送到 broker-b
与我想象的不一样是,我查看源码发现会根据 topic 查到 topic 的路由信息,里面包含了 topic 所在 brokerName,只有 broker-a,也就是在集群之前给 broker-a 所创建的 topic,不会因为集群模式,而发送到别的 broker,即使我在 broker-b 使用 mqadmin 能看到 broker-a 的 topic。
只有如下创建的 topic 才能在发送消息的时候,发送给两个 broker,但如果你是批量发送的话,只会发送给一个 broker。
[root@node100 bin]# ./mqadmin updateTopic -n 10.240.30.100:9876 -t stringRequestTopic102 -c DefaultCluster
RocketMQLog:WARN No appenders could be found for logger (io.netty.util.internal.PlatformDependent0).
RocketMQLog:WARN Please initialize the logger system properly.
create topic to 10.240.30.102:10911 success.
create topic to 10.240.30.100:10911 success.
1
2
3
4
5
2
3
4
5
替换成 syncSend 发送
    private long product()  throws Exception{
        rocketMQTemplate.getProducer().setVipChannelEnabled(false);
        rocketMQTemplate.getProducer().setMaxMessageSize(4194304*10);
        log.debug("生产者组为:{}",rocketMQTemplate.getProducer().getProducerGroup());
        List<Message> messages = new ArrayList<>();
        for (int i=0;i<50;i++) {
            String msg  = "h"+i;
            rocketMQTemplate.syncSend(topic,msg);
        }
        long startTime = System.currentTimeMillis();
//        rocketMQTemplate.getProducer().send(messages);
        long time = System.currentTimeMillis() - startTime;
        log.debug("发送成功,耗时 {} ms",time);
        return time;
    }
1
2
3
4
5
6
7
8
9
10
11
12
13
14
15
2
3
4
5
6
7
8
9
10
11
12
13
14
15


- 消费 setConsumeMessageBatchMaxSize 最大支持 [1,1024],但是调到 1000 最高消费却是 32 个,无法让一个线程消费 1000 个。
我尝试查看源码为什么会只有 32 个,但看到最后发现是 body 大小始终只拿到 5664 个字节,decode 之后 message 只有 32 个。我尝试把 setConsumeMessageBatchMaxSize 和 setPullBatchSize 改到 10,发现 body 的大小是 1770 个字节。我尝试改了内容大小,但与内容没有关系。

- setPullBatchSize 默认是 32 个,在使用 setConsumeMessageBatchMaxSize 调至为 20 的时候,如果 setPullBatchSize 为默认,那么单个线程不一定会拿到 20 个,必须显示调用 setPullBatchSize 为 20 才有效。
- 生产者在批量发送时默认只能发送 4M 数据包,setMaxMessageSize (4194304*10) 可以设置
- 调整线程数量为固定数量,必须同时设置 setConsumeThreadMax (2) 和 setConsumeThreadMin (2)
上次更新: 1/1/2026, 8:54:37 PM