SpringCloud alibaba - Nacos
# 文档学习
Nacos 介绍 (opens new window)
Nacos 下载及配置 (opens new window) 下载地址 (opens new window)
Nacos server 配置说明 (opens new window)
Nacos spring cloud 基础入门 (opens new window)
Nacos spring 注解说明 (opens new window)
Nacos 对应 spring cloud 版本 (opens new window)
Nacos config yml 配置说明 (opens new window)
Nacos discovery yml 配置 API (opens new window)
spring 官网对 cloud alibaba 的介绍及配置 (opens new window)
Nacos config 是监听配置信息 (yml) 发生变化的
Nacos discovery 是注册发现服务的
# discovery
安装好访问页面
# 先搭建基本服务结构
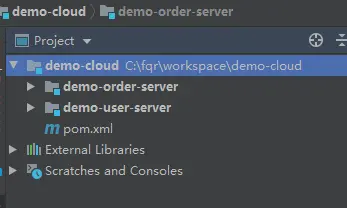
demo-cloud pom.xml
<?xml version="1.0" encoding="UTF-8"?>
<project xmlns="http://maven.apache.org/POM/4.0.0" xmlns:xsi="http://www.w3.org/2001/XMLSchema-instance"
         xsi:schemaLocation="http://maven.apache.org/POM/4.0.0 https://maven.apache.org/xsd/maven-4.0.0.xsd">
    <modelVersion>4.0.0</modelVersion>

    <parent>
        <groupId>org.springframework.boot</groupId>
        <artifactId>spring-boot-starter-parent</artifactId>
        <version>2.2.5.RELEASE</version>
        <relativePath/> <!-- lookup parent from repository -->
    </parent>

    <groupId>com.example</groupId>
    <artifactId>demo-cloud</artifactId>
    <version>0.0.1-SNAPSHOT</version>
    <name>demo-cloud</name>
    <description>Demo project for Spring Boot</description>

    <properties>
        <java.version>1.8</java.version>
    </properties>

    <dependencyManagement>
        <dependencies>
            <dependency>
                <groupId>com.alibaba.cloud</groupId>
                <artifactId>spring-cloud-alibaba-dependencies</artifactId>
                <version>2.1.0.RELEASE</version>
                <type>pom</type>
                <scope>import</scope>
            </dependency>
        </dependencies>
    </dependencyManagement>


    <modules>
        <module>demo-order-server</module>
        <module>demo-user-server</module>
    </modules>


    <dependencies>

        <dependency>
            <groupId>org.springframework.boot</groupId>
            <artifactId>spring-boot-starter-web</artifactId>
        </dependency>

        <dependency>
            <groupId>org.springframework.boot</groupId>
            <artifactId>spring-boot-starter</artifactId>
        </dependency>

        <!-- Nacos 注册发现 -->
        <dependency>
            <groupId>com.alibaba.cloud</groupId>
            <artifactId>spring-cloud-starter-alibaba-nacos-discovery</artifactId>
        </dependency>
        <!-- Nacos 配置监听-->
<!--        <dependency>-->
<!--            <groupId>com.alibaba.cloud</groupId>-->
<!--            <artifactId>spring-cloud-starter-alibaba-nacos-config</artifactId>-->
<!--        </dependency>-->

    </dependencies>

    <build>
        <plugins>
            <plugin>
                <groupId>org.springframework.boot</groupId>
                <artifactId>spring-boot-maven-plugin</artifactId>
            </plugin>
        </plugins>
    </build>

</project>
2
3
4
5
6
7
8
9
10
11
12
13
14
15
16
17
18
19
20
21
22
23
24
25
26
27
28
29
30
31
32
33
34
35
36
37
38
39
40
41
42
43
44
45
46
47
48
49
50
51
52
53
54
55
56
57
58
59
60
61
62
63
64
65
66
67
68
69
70
71
72
73
74
75
76
77
demo-order-server.pom 和 demo-user-server.pom 一样
<?xml version="1.0" encoding="UTF-8"?>
<project xmlns="http://maven.apache.org/POM/4.0.0"
         xmlns:xsi="http://www.w3.org/2001/XMLSchema-instance"
         xsi:schemaLocation="http://maven.apache.org/POM/4.0.0 http://maven.apache.org/xsd/maven-4.0.0.xsd">
    <modelVersion>4.0.0</modelVersion>

    <parent>
        <groupId>com.example</groupId>
        <artifactId>demo-cloud</artifactId>
        <version>0.0.1-SNAPSHOT</version>
    </parent>

    <groupId>com.example</groupId>
    <artifactId>demo-order-server</artifactId>
    <version>0.0.1-SNAPSHOT</version>

</project>
2
3
4
5
6
7
8
9
10
11
12
13
14
15
16
17
demo-order-server.yml
server:
  port: 8080

spring:
  application:
    name: order-server
  cloud:
    nacos:
      discovery:
        server-addr: 127.0.0.1:8848
        # 值范围:1到100。值越大,重量越大。
        weight: 1
        # 集群名称
        cluster-name:  order
2
3
4
5
6
7
8
9
10
11
12
13
14
demo-user-server.yml
server:
  port: 8081

spring:
  application:
    name: user-server
  cloud:
    nacos:
      discovery:
        server-addr: 127.0.0.1:8848
        # 值范围:1到100。值越大,重量越大。
        weight: 1
        # 集群名称
        cluster-name:  user
2
3
4
5
6
7
8
9
10
11
12
13
14
demo-user-server Application
package com.example.userserver;

import org.springframework.boot.SpringApplication;
import org.springframework.boot.autoconfigure.SpringBootApplication;
import org.springframework.boot.web.client.RestTemplateBuilder;
import org.springframework.cloud.client.discovery.EnableDiscoveryClient;
import org.springframework.cloud.client.loadbalancer.LoadBalanced;
import org.springframework.context.annotation.Bean;
import org.springframework.web.client.RestTemplate;

@SpringBootApplication
@EnableDiscoveryClient
public class DemoUserServerApplication {

    public static void main(String[] args) {
        SpringApplication.run(DemoUserServerApplication.class, args);
    }

    /**
     * 手动创建一个RestTemplate的配置:
    **/
    @Bean
    @LoadBalanced
    public RestTemplate restTemplate(RestTemplateBuilder builder){
        return builder.build();
    }
}
2
3
4
5
6
7
8
9
10
11
12
13
14
15
16
17
18
19
20
21
22
23
24
25
26
27
28
demo-order-server Application
package com.example.orderserver;

import org.springframework.boot.SpringApplication;
import org.springframework.boot.autoconfigure.SpringBootApplication;
import org.springframework.cloud.client.discovery.EnableDiscoveryClient;

@SpringBootApplication
@EnableDiscoveryClient
public class DemoOrderServerApplication {

    public static void main(String[] args) {
        SpringApplication.run(DemoOrderServerApplication.class, args);
    }

}
2
3
4
5
6
7
8
9
10
11
12
13
14
15
16
demo-order-server OrderController
package com.example.orderserver.controller;

import org.springframework.web.bind.annotation.*;

import java.util.Arrays;
import java.util.HashMap;
import java.util.List;
import java.util.Map;

/**
 * @Author big uncle
 * @Date 2020/3/20 11:33
 * @module HYQ_APP
 **/
@RestController
@RequestMapping("order")
public class OrderController {

    Map<String,List<String>> map = new HashMap<String,List<String>>(10){{
        put("1",Arrays.asList("userId:1 orderId:1","userId:1 orderId:2","userId:1 orderId:3","userId:1 orderId:4"));
        put("2",Arrays.asList("userId:2 orderId:10","userId:2 orderId:12","userId:2 orderId:13","userId:2 orderId:14"));
        put("3",Arrays.asList("userId:3 orderId:20","userId:3 orderId:22","userId:3 orderId:23","userId:3 orderId:24"));
    }};


    @GetMapping("/getOrder/{userId}")
    public List<String> getOrder(@PathVariable String userId){
        return map.get(userId);
    }

}
2
3
4
5
6
7
8
9
10
11
12
13
14
15
16
17
18
19
20
21
22
23
24
25
26
27
28
29
30
31
32
demo-user-server OrderController
package com.example.userserver.controller;

import org.springframework.beans.factory.annotation.Autowired;
import org.springframework.web.bind.annotation.GetMapping;
import org.springframework.web.bind.annotation.RequestMapping;
import org.springframework.web.bind.annotation.RequestParam;
import org.springframework.web.bind.annotation.RestController;
import org.springframework.web.client.RestTemplate;

import java.util.List;

/**
 * 所属Y-API模块
 * 模块描述
 *
 * @Author big uncle
 * @Date 2020/3/20 11:24
 * @module HYQ_APP
 **/
@RestController
@RequestMapping("user")
public class UserController {

    private RestTemplate restTemplate;

    @Autowired
    public UserController(RestTemplate restTemplate) {
        this.restTemplate = restTemplate;
    }


    @GetMapping("/getMyOrder")
    public List<String> getMyOrder(@RequestParam("userId") String userId){
        List<String> list = restTemplate.getForObject("http://order-server/order/getOrder/" + userId, List.class);
        return list;
    }

}
2
3
4
5
6
7
8
9
10
11
12
13
14
15
16
17
18
19
20
21
22
23
24
25
26
27
28
29
30
31
32
33
34
35
36
37
38
39
# 启动
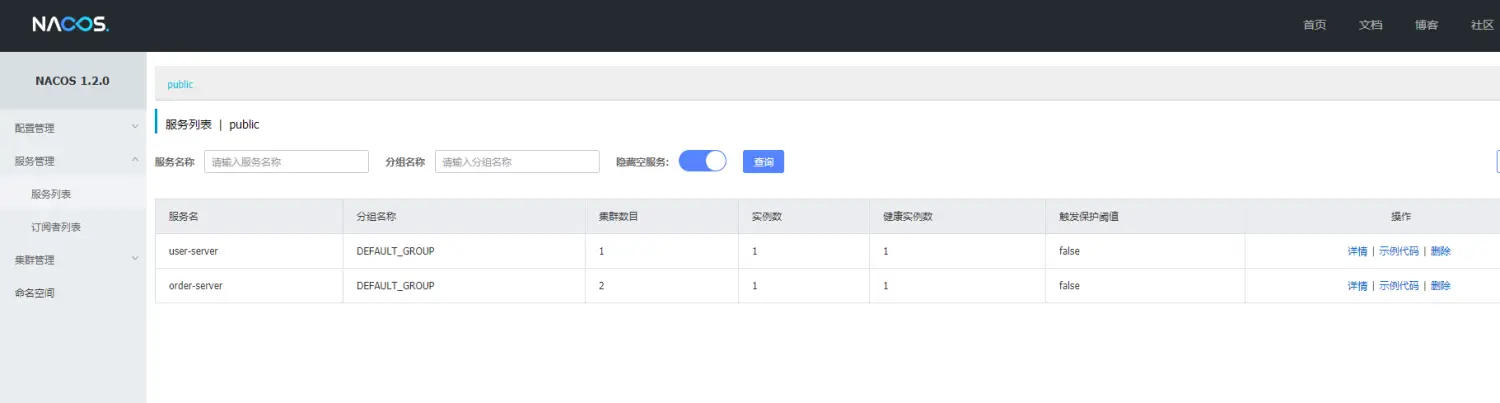
# 访问结果
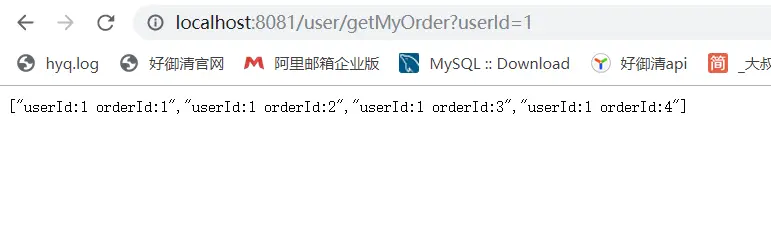
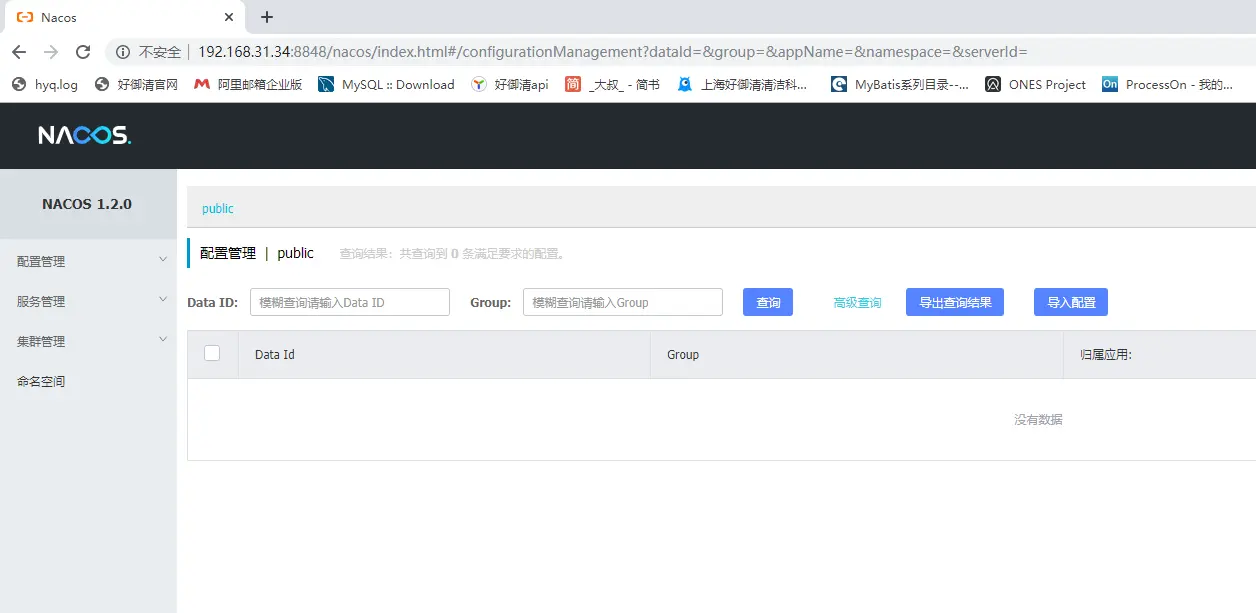
# config
# 添加配置
<!-- Nacos 动态更新配置 -->
<dependency>
    <groupId>com.alibaba.cloud</groupId>
    <artifactId>spring-cloud-starter-alibaba-nacos-config</artifactId>
</dependency>
2
3
4
5
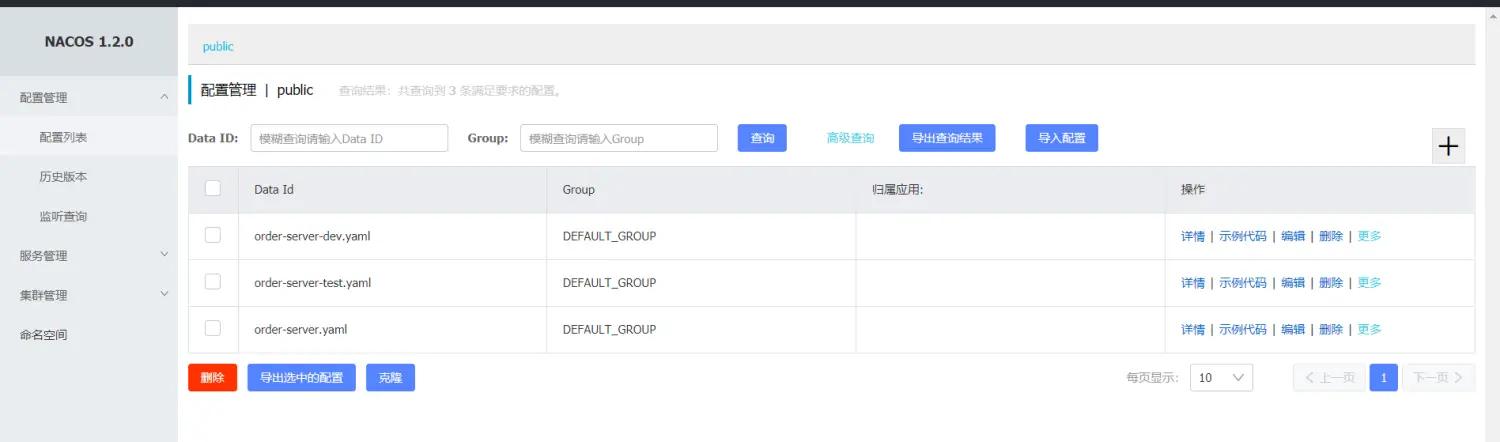
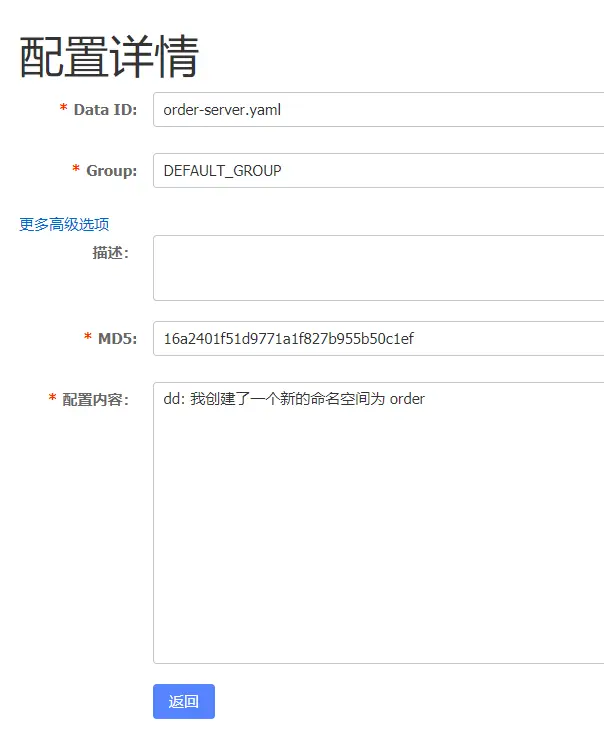
# 在 Nacos Server 里定义 dataid
在这里我要提醒大家官网对 dataid 的定义
dataid = ${prefix}-${spring.profile.active}.${file-extension}
* `prefix` 默认为 `spring.application.name` 的值,也可以通过配置项 `spring.cloud.nacos.config.prefix`来配置。
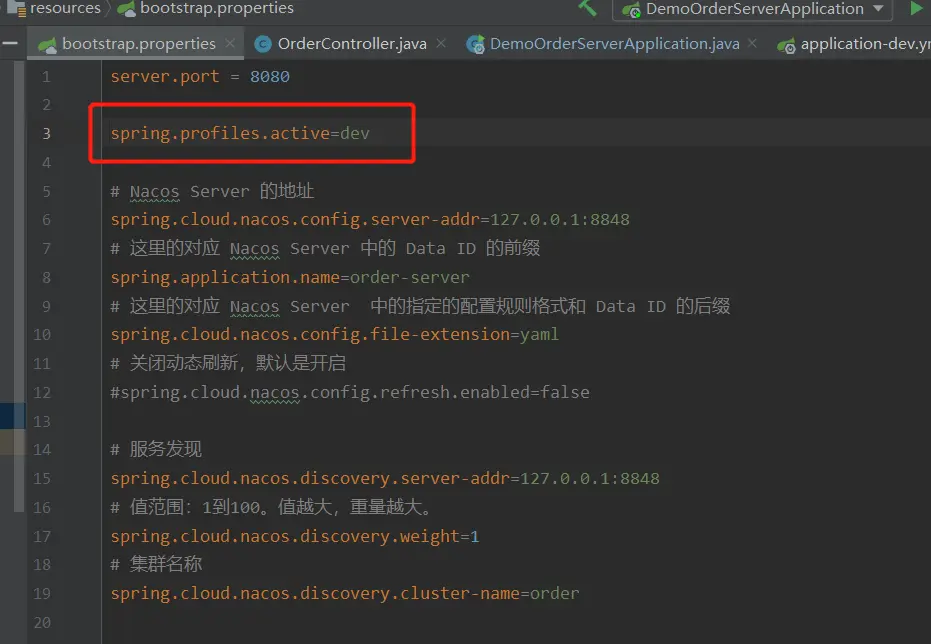
* `spring.profile.active` 即为当前环境对应的 profile,也就是项目配置文件中的 spring.profiles.active=dev。 **注意:当 `spring.profile.active` 为空时,对应的连接符 `-` 也将不存在,dataId 的拼接格式变成 `${prefix}.${file-extension}`**
* `file-exetension` 为配置内容的数据格式,可以通过配置项 `spring.cloud.nacos.config.file-extension` 来配置。目前只支持 `properties` 和 `yaml` 类型。
2
3
4
5


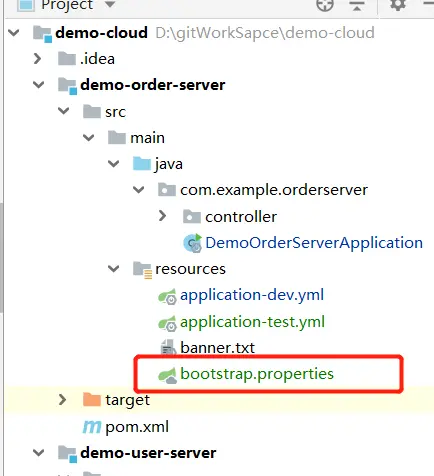
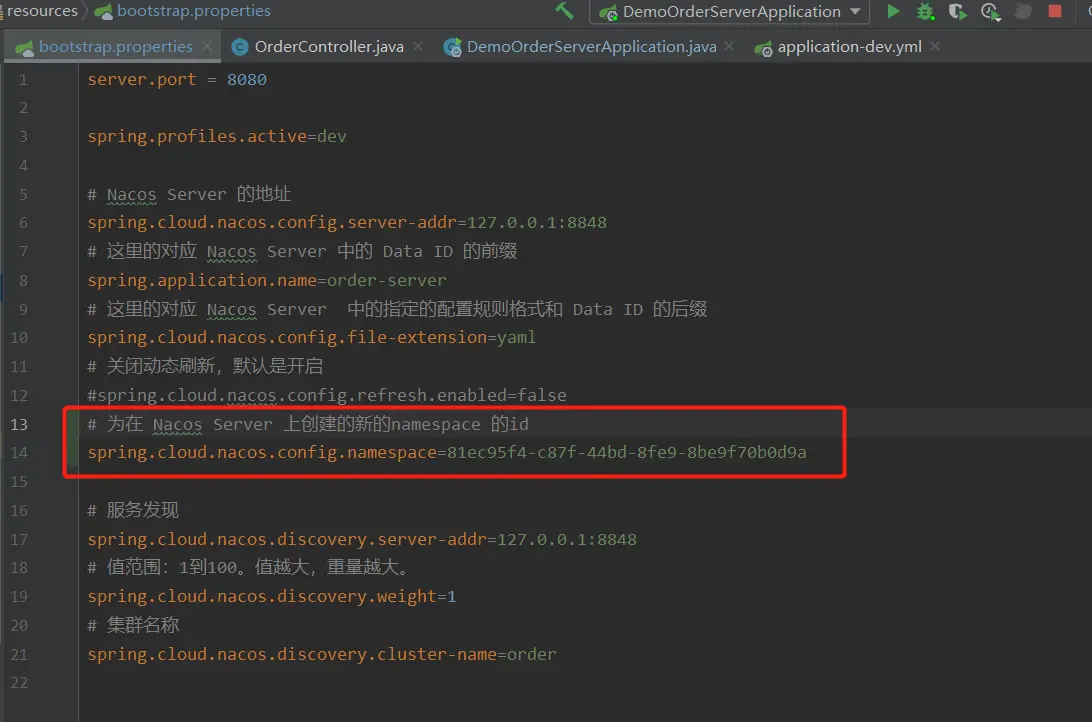
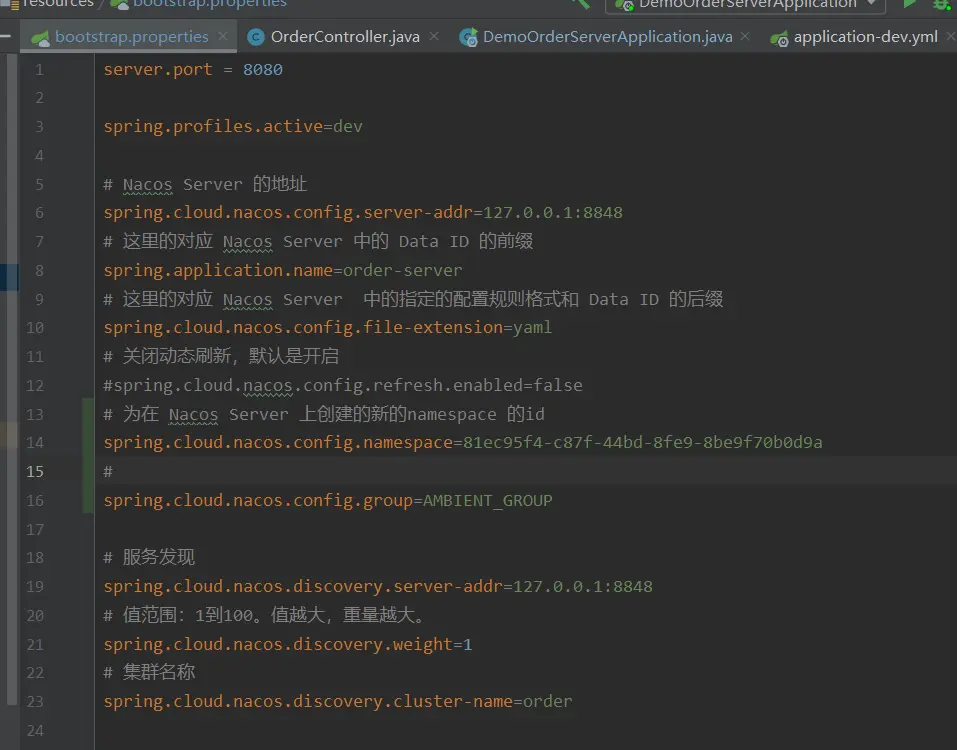
# 配置文件
一定要注意的是 Nacos 的在项目中 config 的配置一定要写在 bootstrap.properties,注意是 bootstrap.properties ,不是 bootstrap.yml。Spring Boot 配置文件的加载顺序,依次为 bootstrap.properties -> bootstrap.yml ->application.properties -> application.yml,其中 bootstrap.properties 配置为最高优先级。
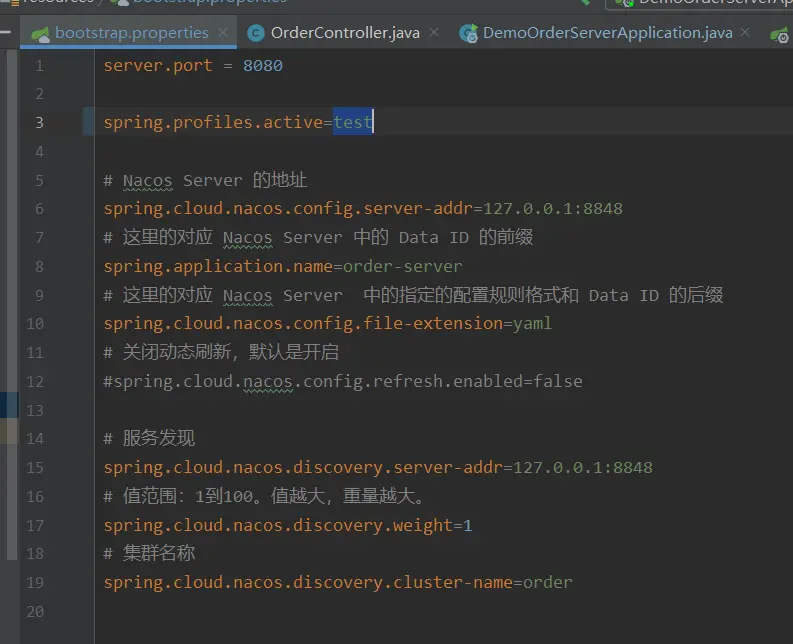
# 配置文件内容
server.port = 8080

spring.profiles.active=dev

# Nacos Server 的地址
spring.cloud.nacos.config.server-addr=127.0.0.1:8848
# 这里的对应 Nacos Server 中的 Data ID 的前缀
spring.application.name=order-server
# 这里的对应 Nacos Server  中的指定的配置规则格式和 Data ID 的后缀
spring.cloud.nacos.config.file-extension=yaml
# 关闭动态刷新,默认是开启
#spring.cloud.nacos.config.refresh.enabled=false

# 服务发现
spring.cloud.nacos.discovery.server-addr=127.0.0.1:8848
# 值范围:1到100。值越大,重量越大。
spring.cloud.nacos.discovery.weight=1
# 集群名称
spring.cloud.nacos.discovery.cluster-name=order
2
3
4
5
6
7
8
9
10
11
12
13
14
15
16
17
18
19
20
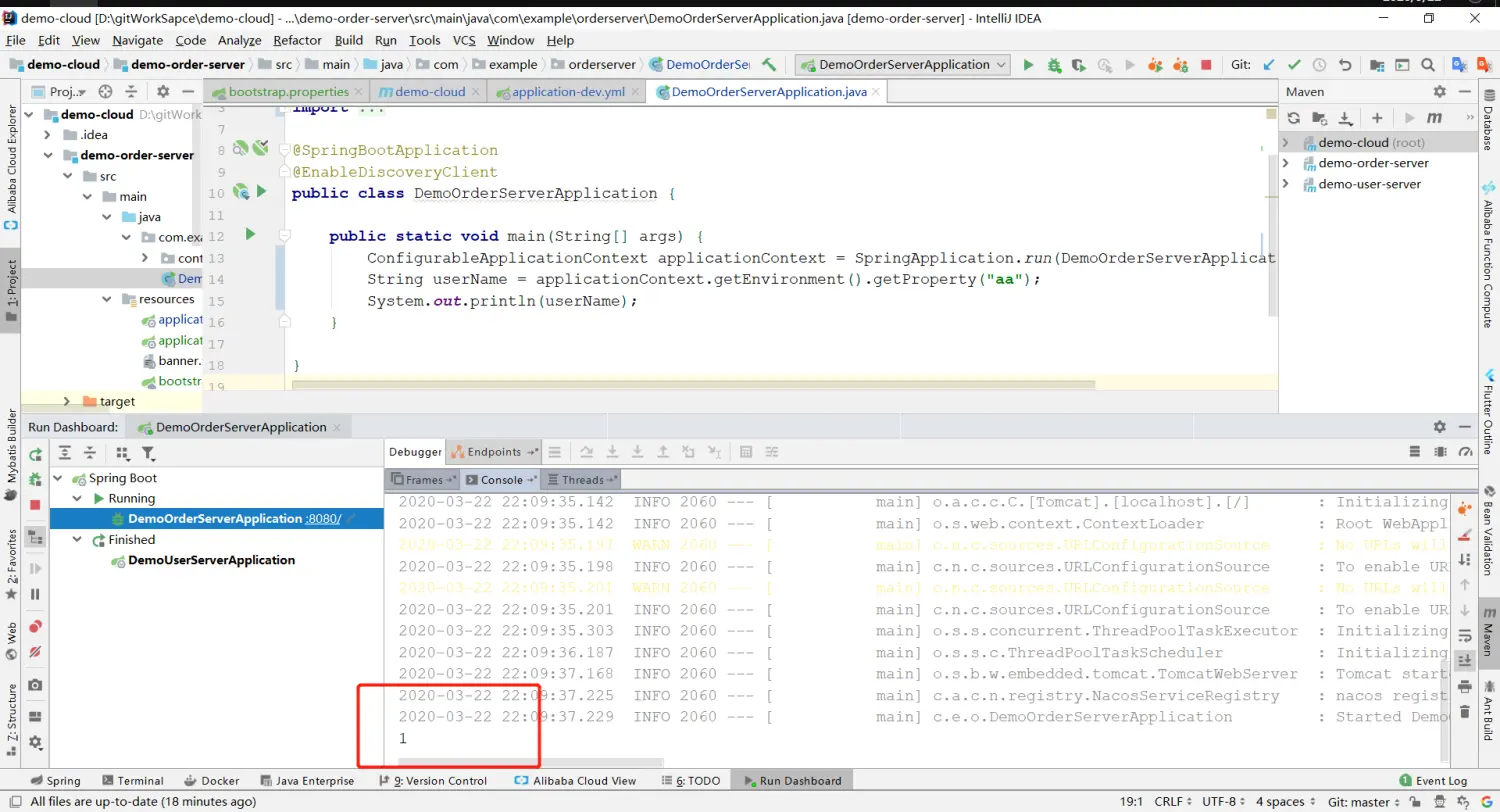
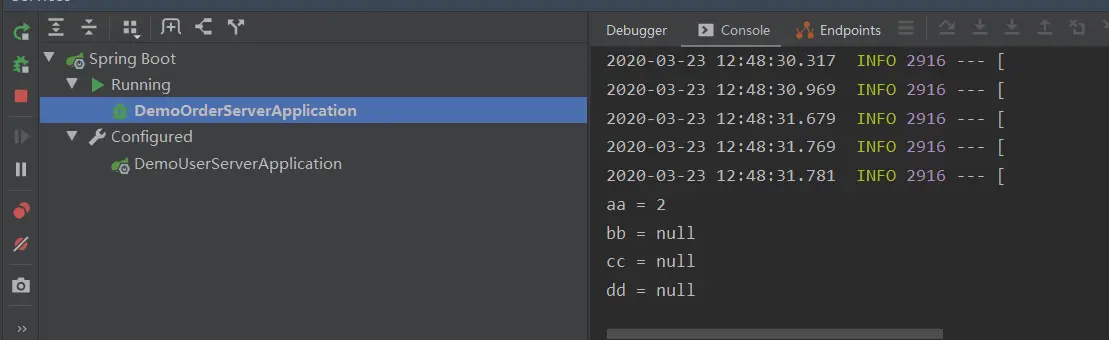
# 测试运行
# DemoOrderServerApplication 测试方式
    public static void main(String[] args) {
        ConfigurableApplicationContext applicationContext = SpringApplication.run(DemoOrderServerApplication.class, args);
        String userName = applicationContext.getEnvironment().getProperty("aa");
        System.out.println(userName);
    }
2
3
4
5
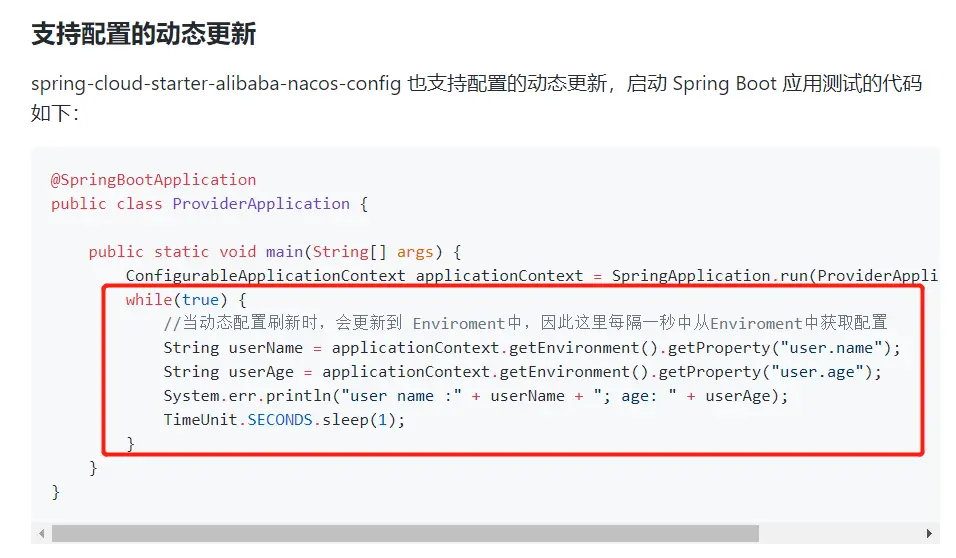
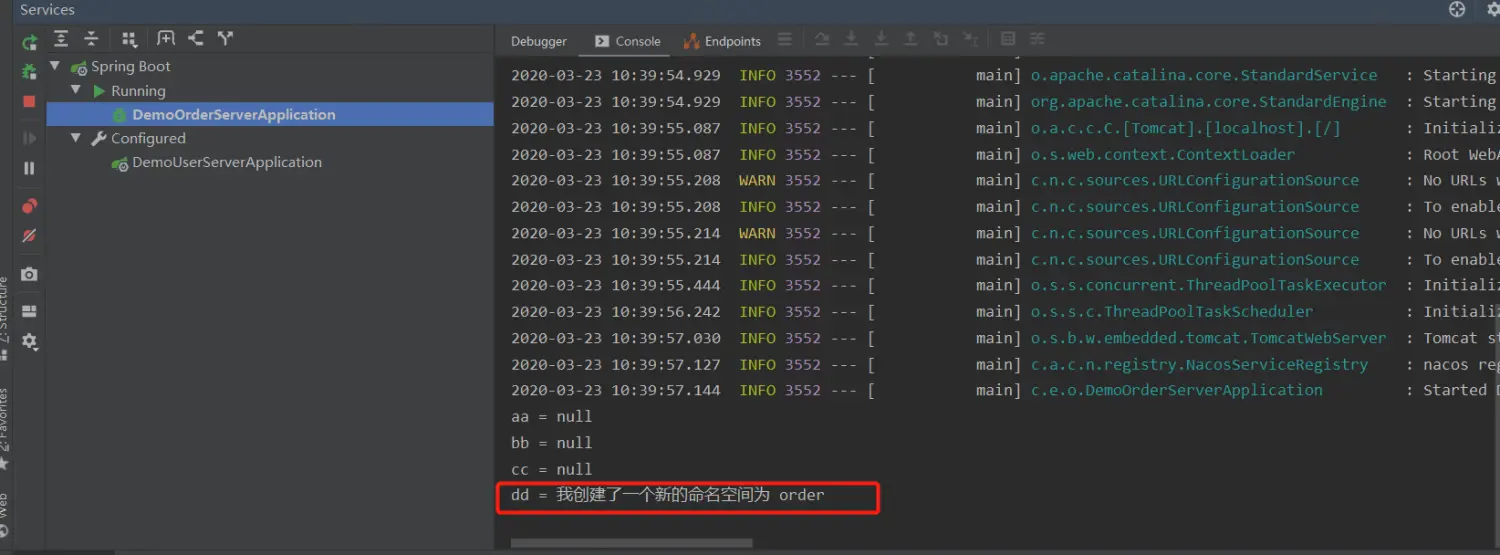
# 动态监听方式
官方就是加了个 while (true) 哈哈哈哈哈,其实意思就是告诉我们,你在 Nacos Server 里更改的值,是可以被程序发现的。
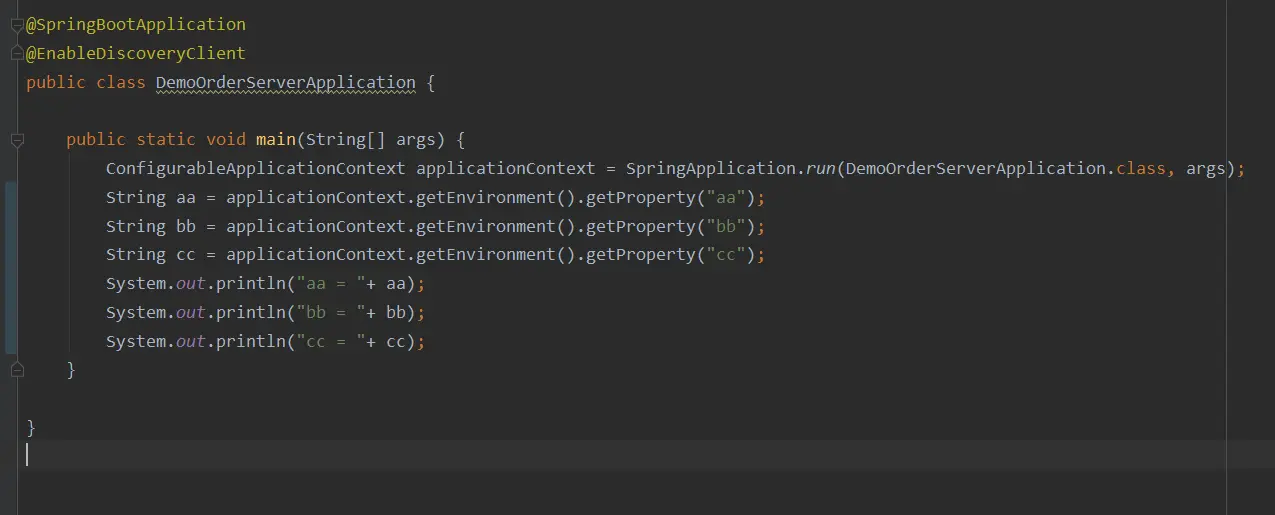
# 注解方式运行
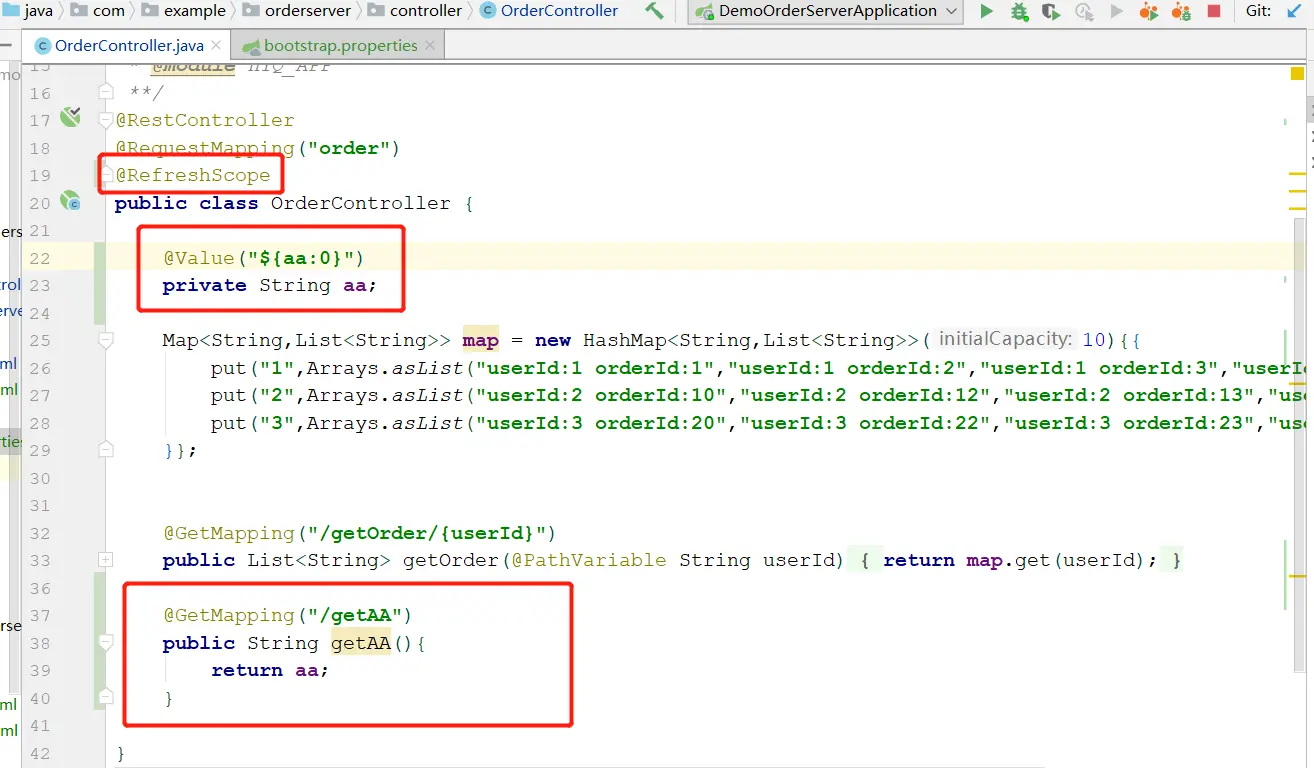
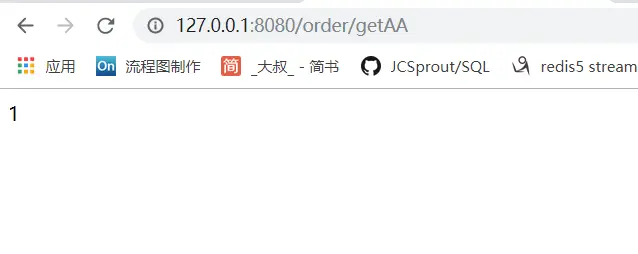
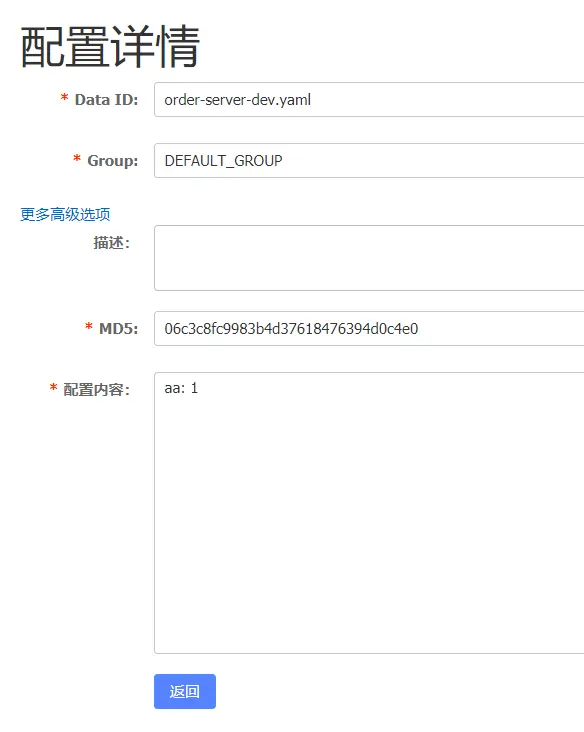
从以上的结果可以看到:
- 我们并没有在配置文件中配置 aa 这个属性,但是程序正确运行,且读到结果为 1
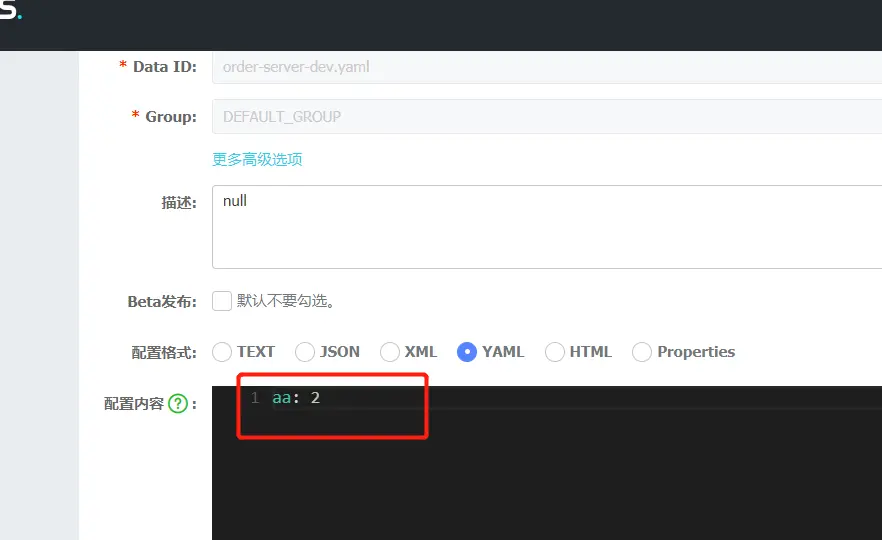
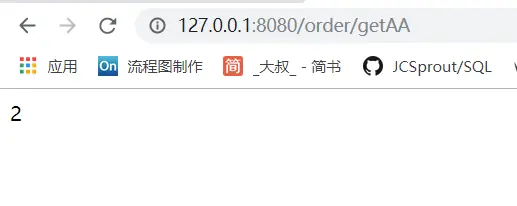
- 我们通过更改 Nacos Server 的值,发现的确实现了动态更新。
# 可支持 profile 粒度的配置

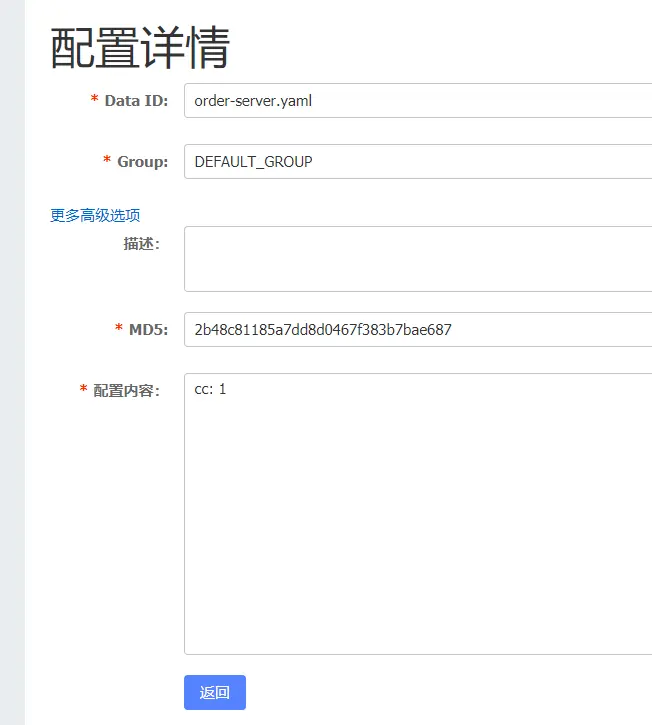
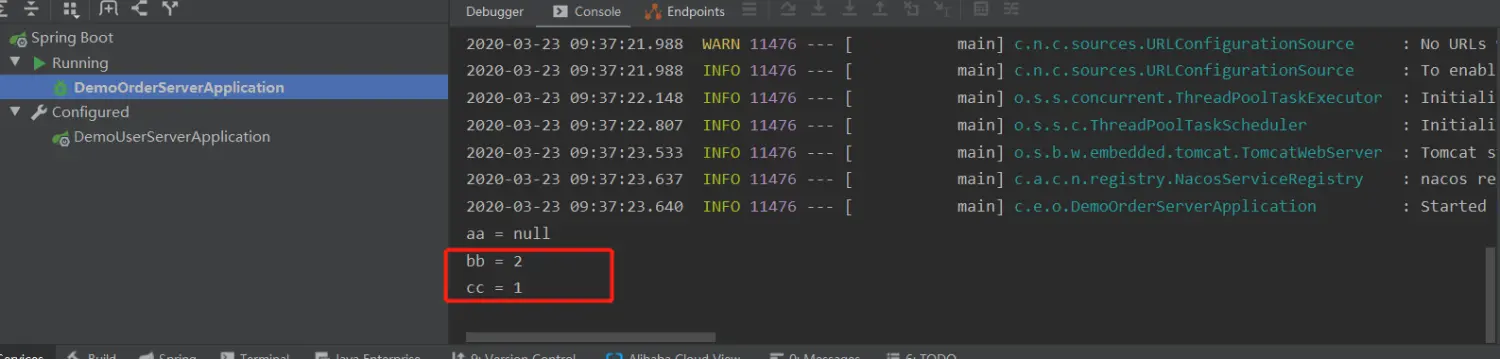
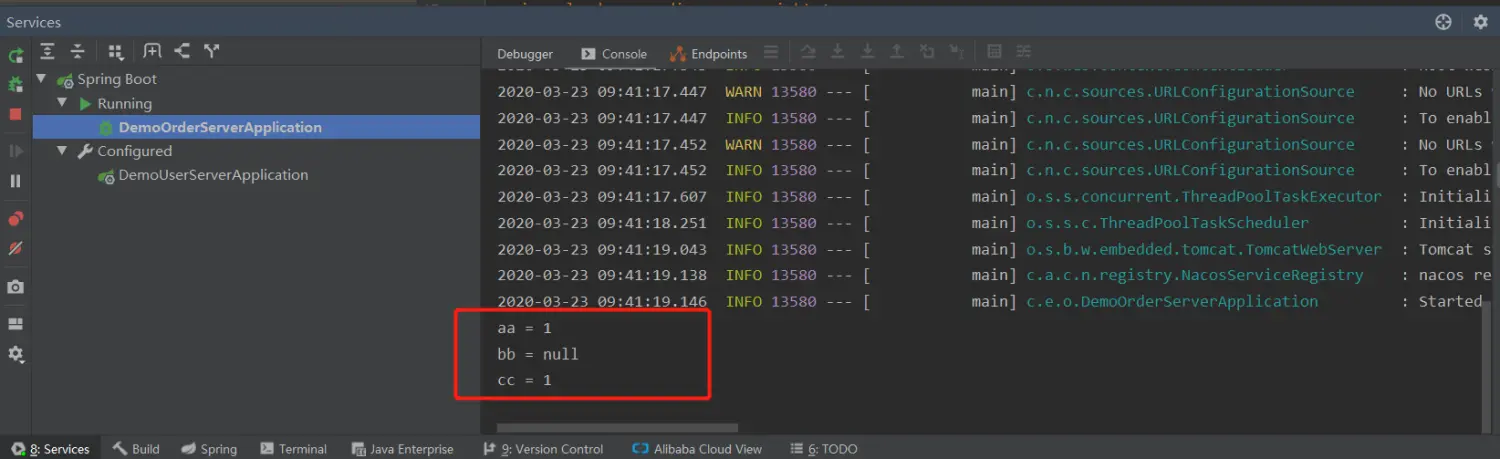
从以上测试结果我们可以看出,Nacos 有默认配置一说,也就是不管你没有没有 profile 都会默认加载你的 dataid 为如下:
${spring.application.name}.${file-extension}
${spring.profiles.active} 当通过配置文件来指定时必须放在 bootstrap.properties 文件中。
2
# 命名空间 namespace
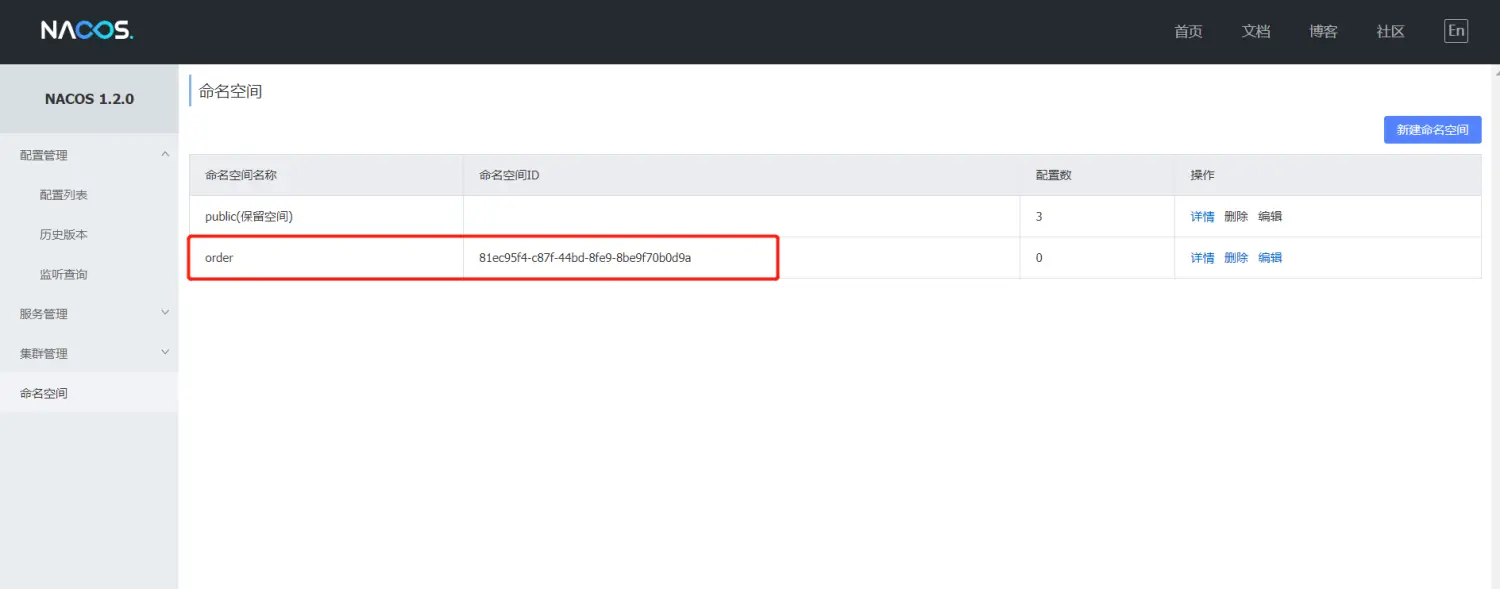
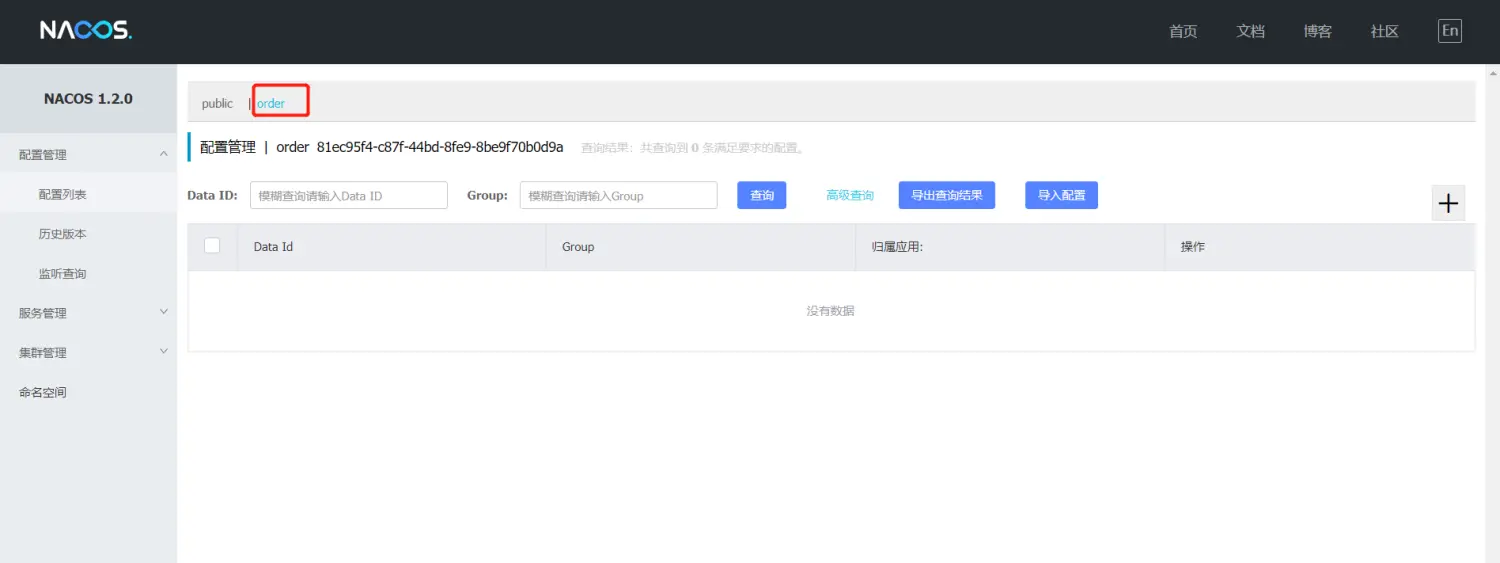


命名空间的使用建议和业务有关,比如是 order,那么我们就在 order 的空间里面存放 order-dev 环境,order-test 环境。
# 关于 Group 的配置
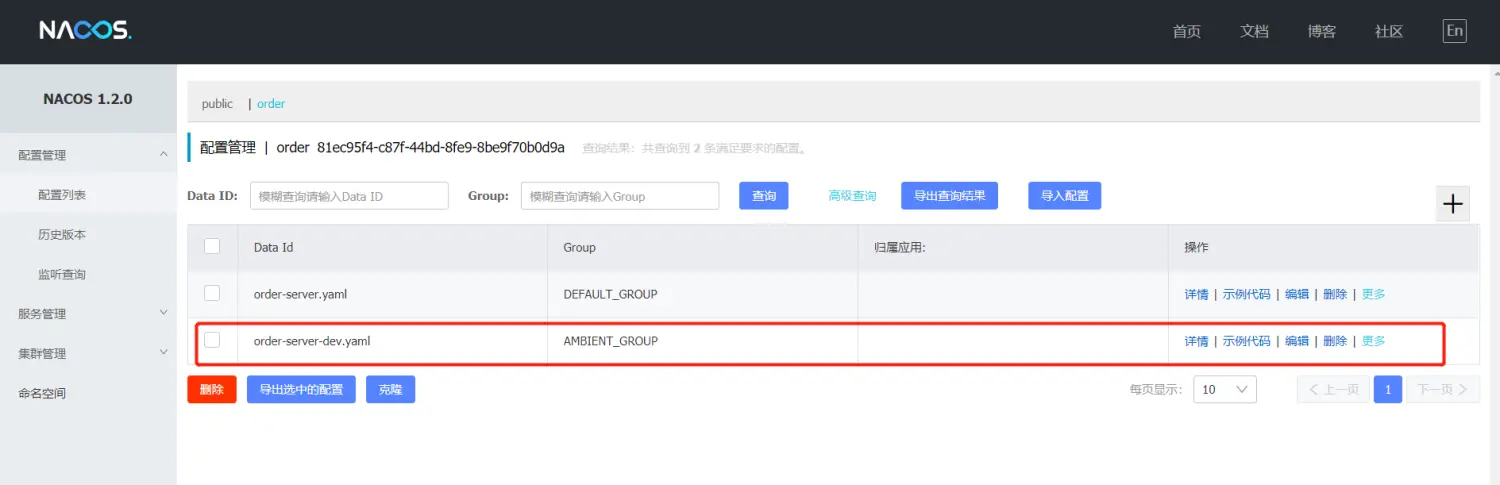

对于组的认识,我觉得就是给配置分类型,比如说环境是一组,数据是一组等。
# 支持可扩展的 Data Id 配置 及 优先级
基于对上面的理解以后,看这里其实看官方 demo 就知道是什么意思了,所以这里我就不在做测试说明了。 留下官方地址就行 (opens new window)
# 完全关闭配置
通过设置 spring.cloud.nacos.config.enabled = false 来完全关闭 Spring Cloud Nacos Config
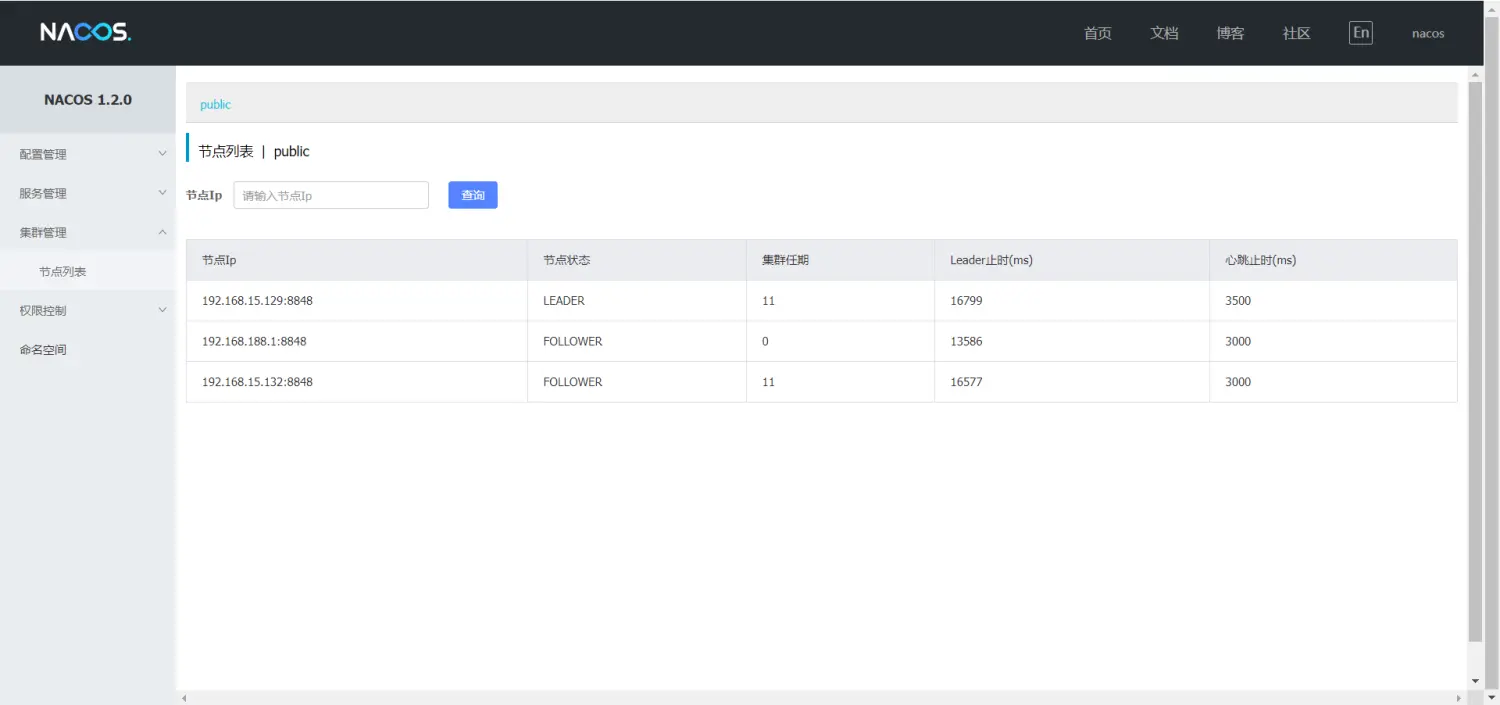
# nacos 集群
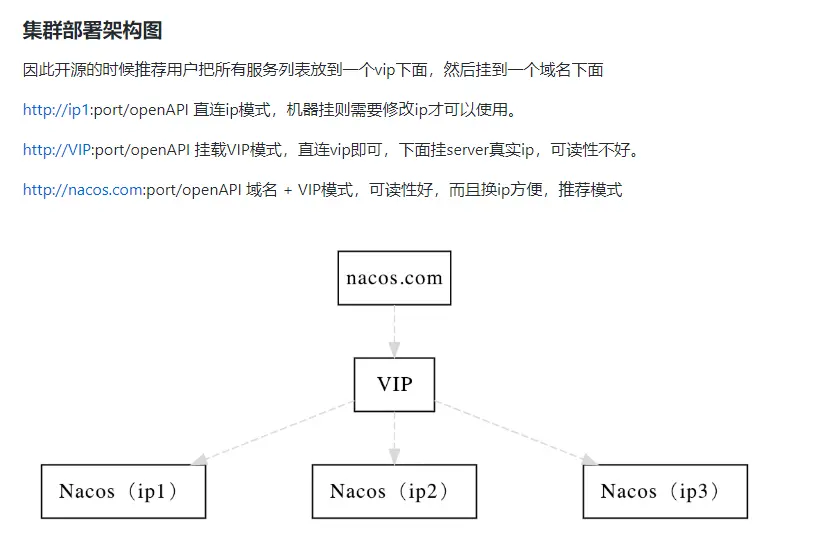
# 修改配置
在 conf 目录下 copy cluster.conf.example 文件新建 cluster.conf,配置内容如下:
# ip:port
192.168.188.1:8848
192.168.15.129:8848
192.168.15.132:8848
2
3
4
# 启动 Nacos 服务
启动之前先进开放端口
/sbin/iptables -I INPUT -p tcp --dport 8848 -j ACCEPT
启动
单机启动方法
sh startup.sh -m standalone
集群启动方法
sh startup.sh
2
3
4
如果有一下报错
[root@localhost bin]# sh startup.sh -m standalone
startup.sh: line 16: syntax error near unexpected token `$'in\r''
'tartup.sh: line 16: `case "`uname`" in
2
3
编辑 startup.sh 使用以下命令解决报错,然后保存,运行。
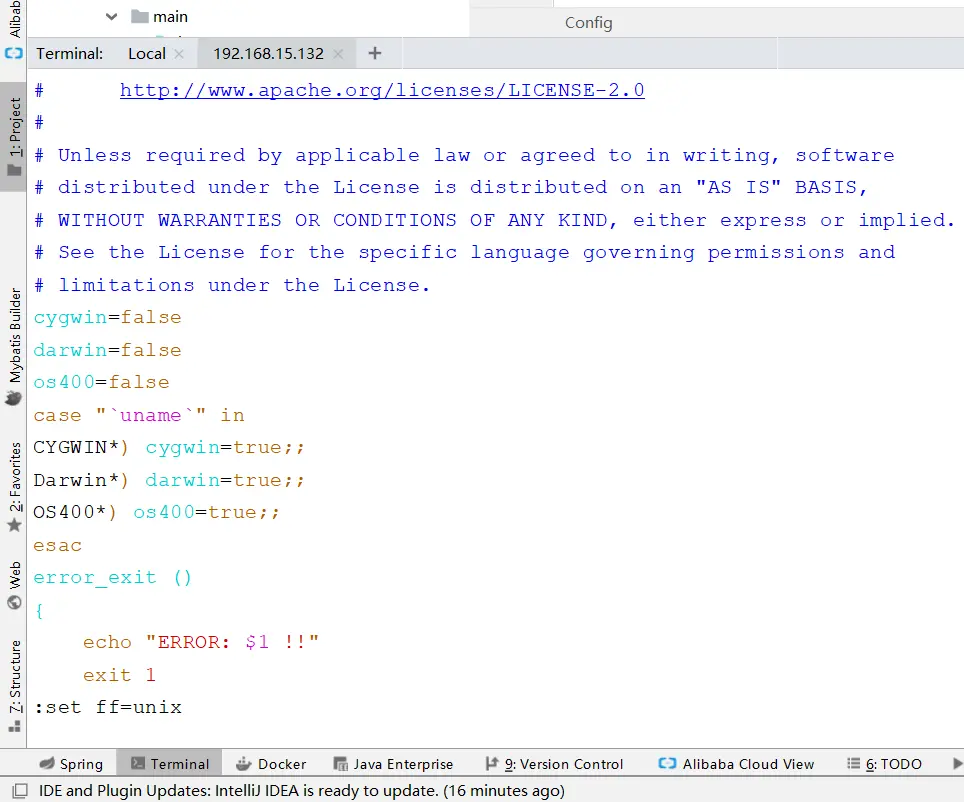
启动成功