 使用 Nexus3.x 搭建私服
下载地址 https://help.sonatype.com/repomanager3/product-information/download,下载好后进行解压缩会得到两个文件,nexus-3.39.0-01 和 sonatype-work。可以配置 nexus 变量到我们的环境中方便启动,也可以不配置每次都到 nexus-3.39.0-01/bin 下去启动。
NEXUS_HOME: /opt/software/nexus3/nexus-3.39.0-01/
PATH: %NEXUS_HOME%/bin
2
nexus 默认使用的是 8081 端口,很多微服务的端口都会从 8080 等开始使用,可以修改 nexus 的端口,具体位置文件为 /opt/software/nexus3/nexus-3.39.0-01/etc/nexus-default.properties
启动 nexus 命令
./nexus {start|stop|run|run-redirect|status|restart|force-reload}

# 提示信息
WARNING: ************************************************************
WARNING: Detected execution as "root" user.  This is NOT recommended!
WARNING: ************************************************************

# 这个信息需要修改 /opt/software/nexus3/nexus-3.39.0-01/bin/nexus 文件,找到 run_as_root=true,改为如下
run_as_root=false
2
3
4
5
6
7
8
9
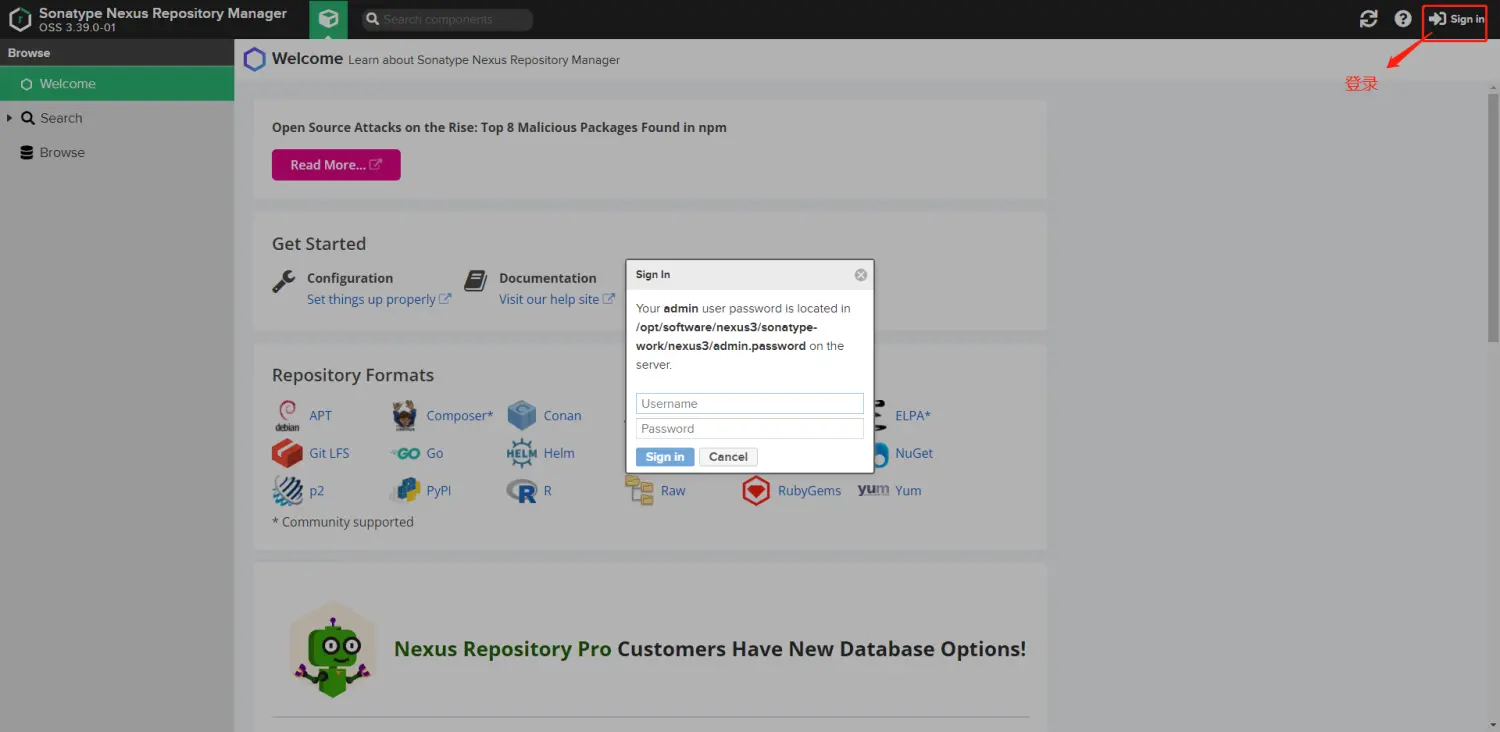
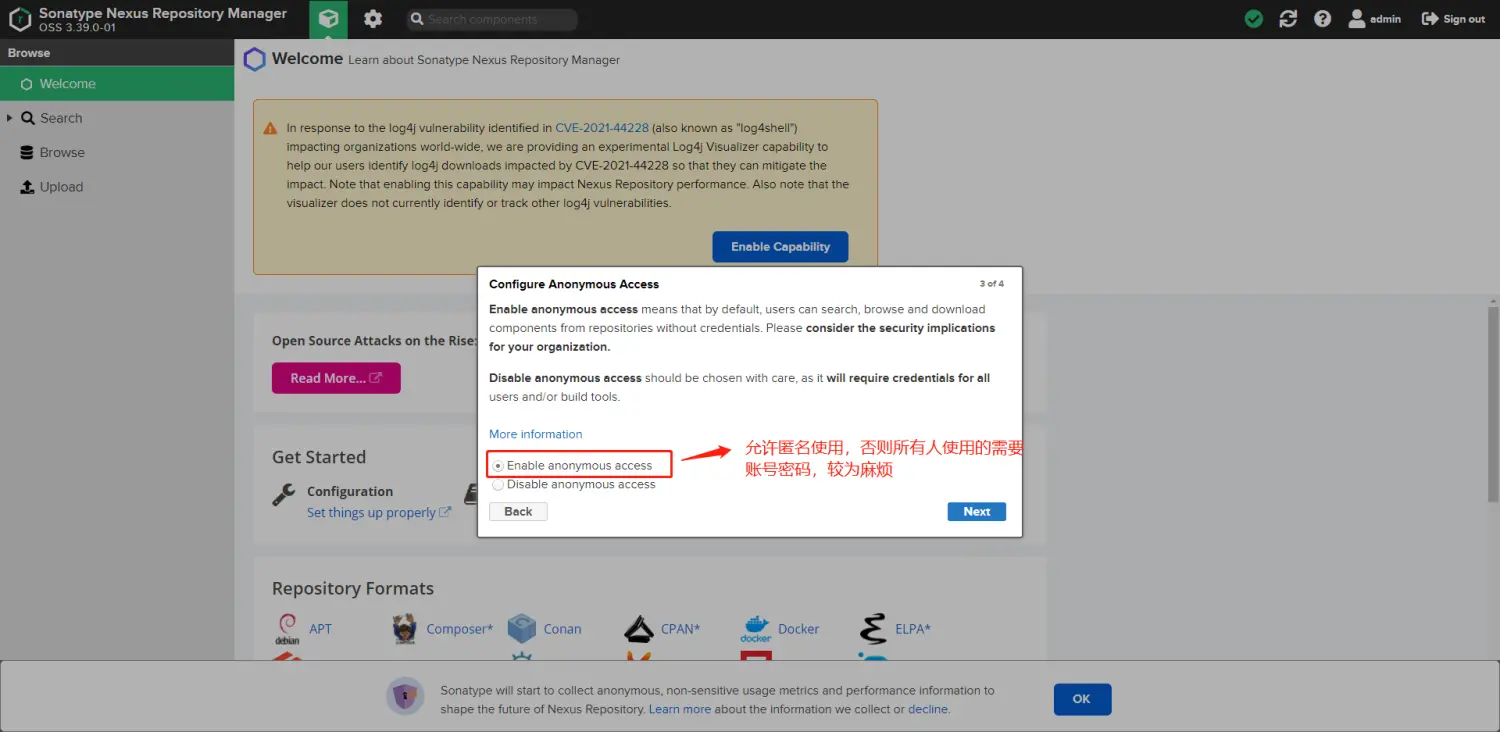
启动成功后就可以登录 nexus 所提供的客户端界面,登录的时候会问你要账号密码,账号默认是 admin,密码在 /opt/software/nexus3/sonatype-work/nexus3/admin.password 文件中,登录成功后会要求更改密码,密码更改后 admin.password 会自动删除。修改会会让你选择严格模式,建议允许所有人访问,毕竟是私服没太大必要严格。
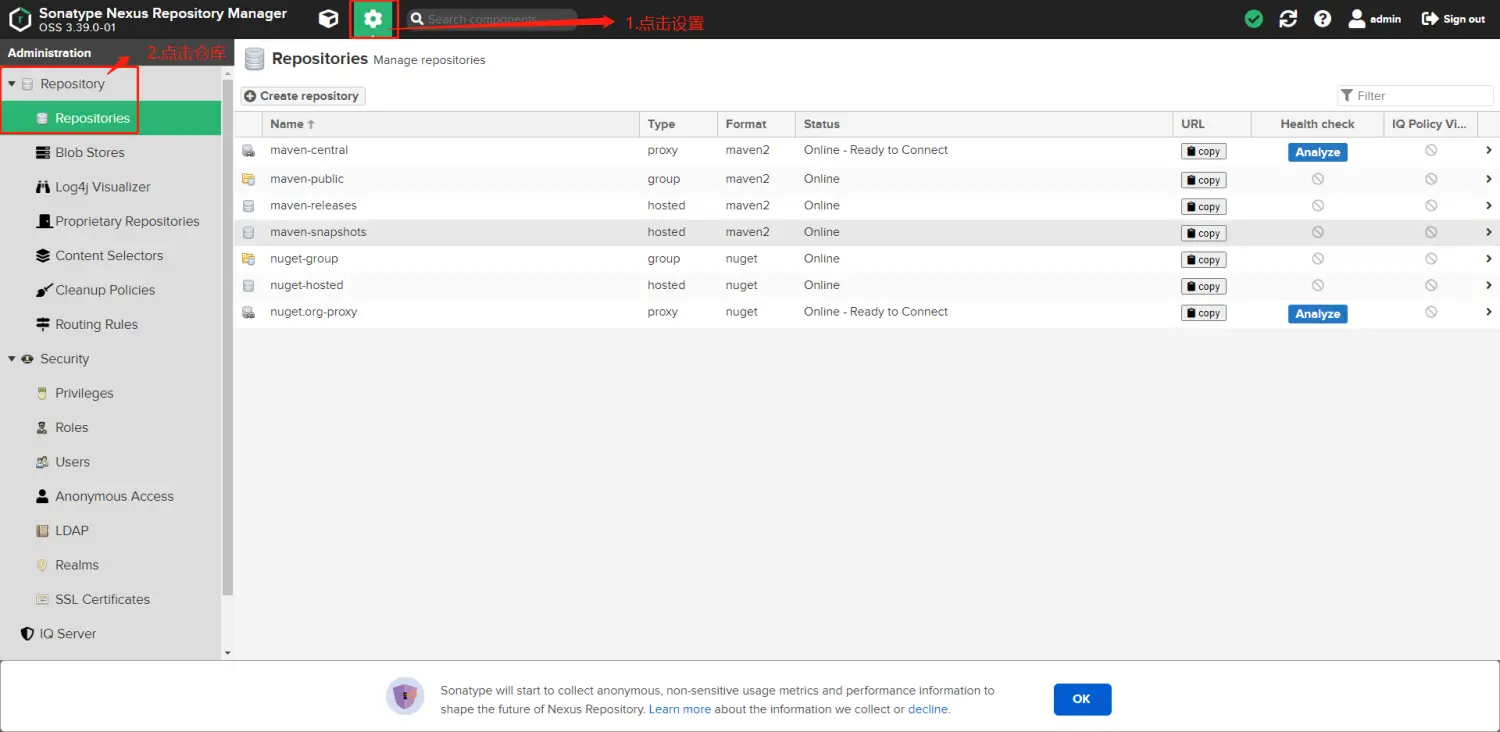
点击设置、点击仓库,我们可以看到仓库管理配置列表,其中跟 Maven 相关的有 4 个,Maven 相对有 3 个 Type
- proxy,表示为代理仓库,下载组件时,如果代理仓库搜索不到,则把请求转发到远程仓库(默认 https://repo1.maven.org/maven2/,该地址可以修改),并从远程仓库下载,然后将该组件缓存到代理库,当再次请求该组件时,则直接到代理仓库下载,不会再从远程仓库下载。
- hosted
表示宿主仓库,主要用来部署团队内部组件,其中 maven-releases 用来部署团队内部的发布版组件,maven-snapshots 用来部署团队内部的快照版组件。 - group
表示分组仓库,默认将 maven-central、maven-releases、maven-snapshots 三个仓库组合在一起对外提供服务,简化了 maven 客户端在 setting.xml 或 pom.xml 的配置
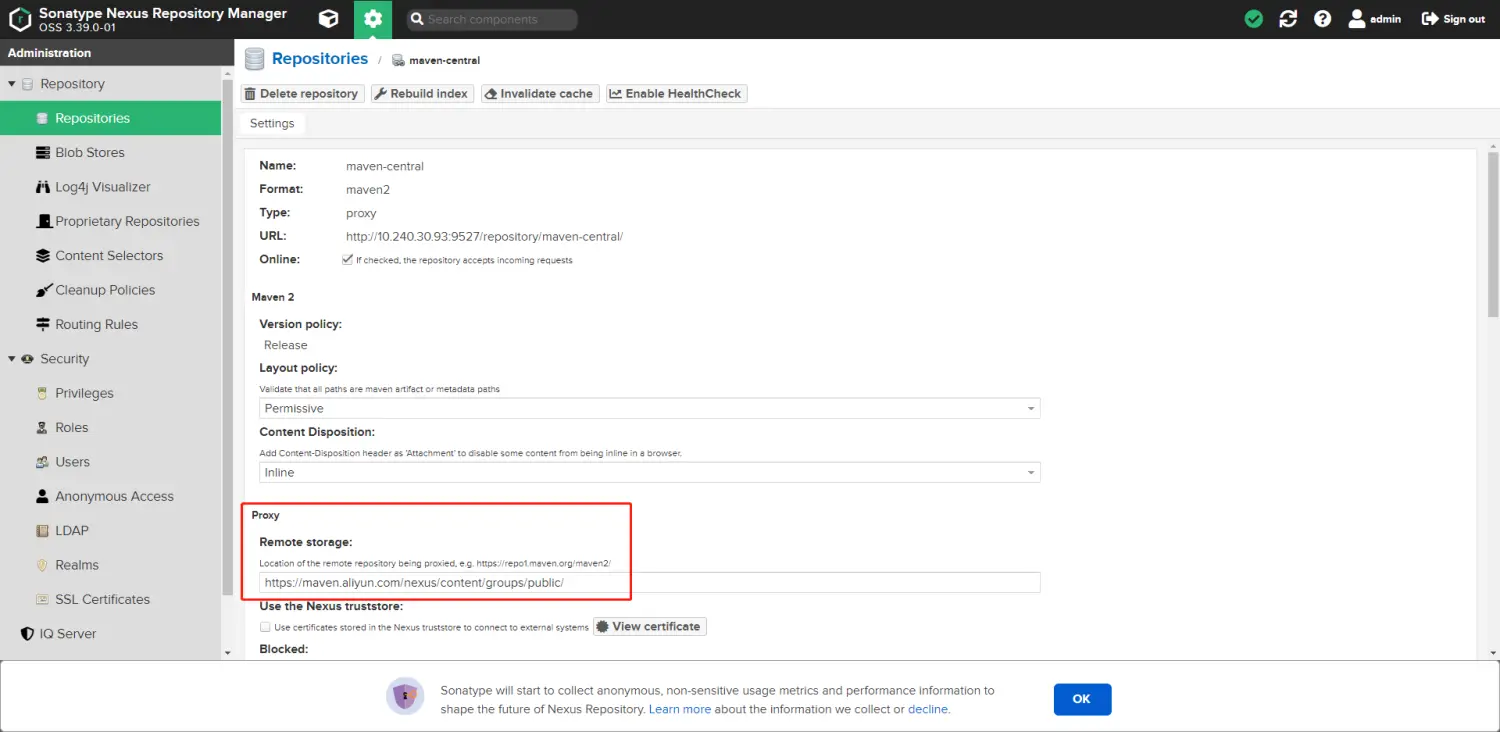
修改 maven-central 的 proxy 地址,你可以在列表中点击 maven-central,就会进到 maven-central 的编辑页,然后在 Remote storage 修改为阿里云的仓库点击保存即可。
https://maven.aliyun.com/nexus/content/groups/public/
maven 想使用我们自己搭建的 nexus,只需要在 maven-3.8.4\conf\settings.xml 文件修改镜像地址即可
  <mirrors>
	<!-- 阿里云 -->
	<!--
    <mirror>
      <id>alimaven</id>
      <name>aliyun maven</name>
      <url>https://maven.aliyun.com/nexus/content/groups/public/</url>
      <mirrorOf>central</mirrorOf>
    </mirror>
	-->
    <mirror>
      <id>nexus</id>
      <mirrorOf>*</mirrorOf>
      <url>http://10.240.30.93:9527/repository/maven-public/</url>
    </mirror>
  </mirrors>
2
3
4
5
6
7
8
9
10
11
12
13
14
15
16
按照以上的操作,我们只新启动一个项目,并在项目中指定该 maven,此时我们下载的 jar 就会缓存到 nexus 里,当其他同事使用该项目就会发现该项目的依赖下载为我们 nexus 的部署地址。
但是这还不够,在实际开发中,除了我们本身使用的第三方依赖外,我们自己也会写一些依赖包或工具包等,此时若想让其他同事可以下载并依赖使用,我们就需要把我们制作的 jar 发布到 nexus 里去。我们先要在我们的 maven 的 settings.xml 中配置在 nexus 的账号密码
  <servers>
    <server>
      <!-- 注意id  nexus-->
      <id>nexus</id>
      <username>admin</username>
      <password>admin</password>
    </server>
  </servers>
2
3
4
5
6
7
8
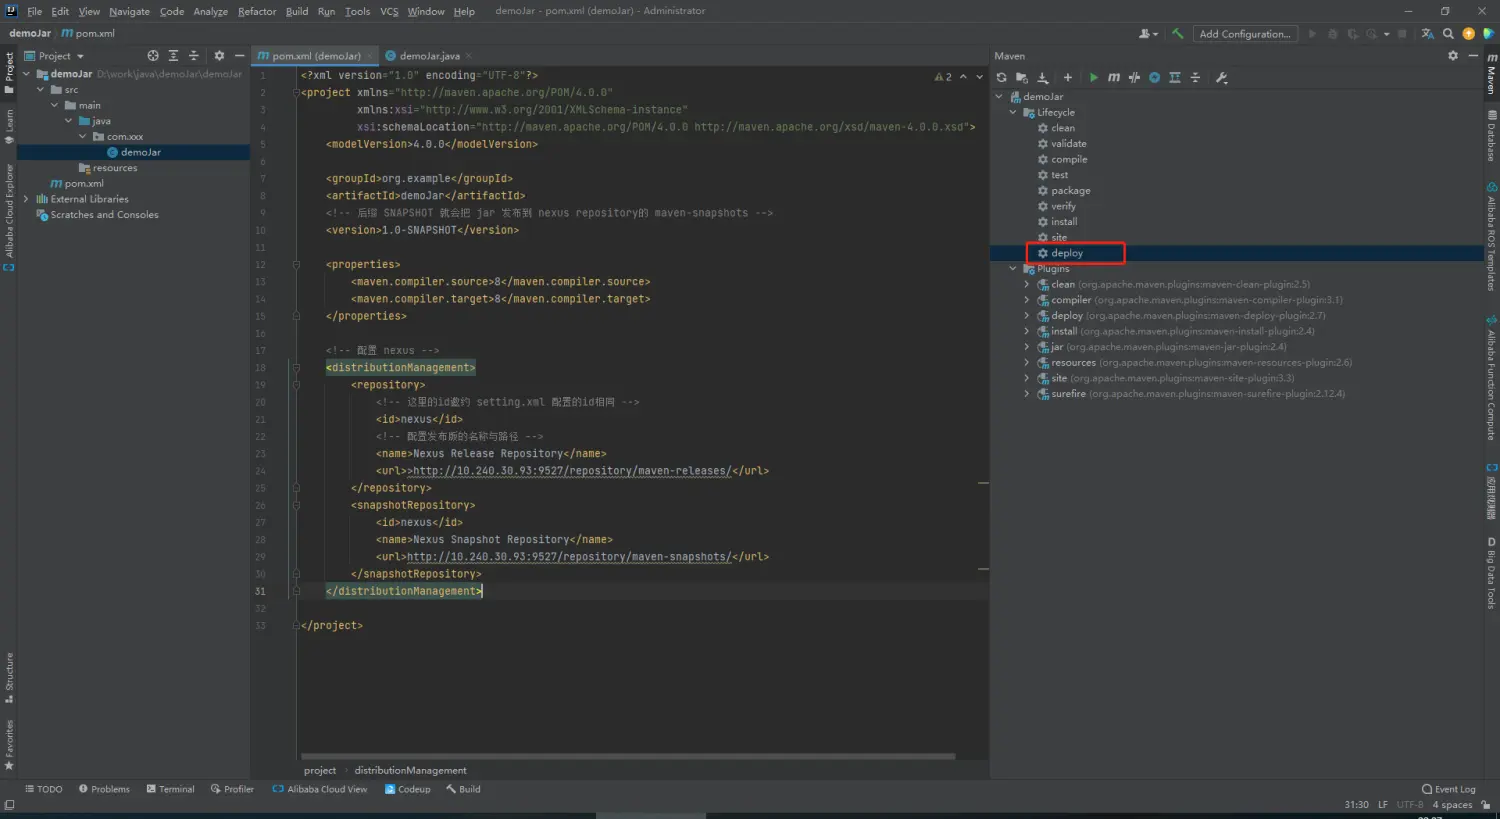
之后我们只需要创建我们的 jar 并添加一些配置即可,相应配置在代码中有说明
<?xml version="1.0" encoding="UTF-8"?>
<project xmlns="http://maven.apache.org/POM/4.0.0"
         xmlns:xsi="http://www.w3.org/2001/XMLSchema-instance"
         xsi:schemaLocation="http://maven.apache.org/POM/4.0.0 http://maven.apache.org/xsd/maven-4.0.0.xsd">
    <modelVersion>4.0.0</modelVersion>

    <groupId>org.example</groupId>
    <artifactId>demoJar</artifactId>
    <!-- 后缀 SNAPSHOT 就会把 jar 发布到 nexus repository的 maven-snapshots -->
    <version>1.0-SNAPSHOT</version>

    <properties>
        <maven.compiler.source>8</maven.compiler.source>
        <maven.compiler.target>8</maven.compiler.target>
    </properties>

    <!-- 配置 nexus -->
    <distributionManagement>
        <repository>
            <!-- 这里的id邀约 setting.xml 配置的id相同 -->
            <id>nexus</id>
            <!-- 配置发布版的名称与路径 -->
            <name>Nexus Release Repository</name>
            <url>>http://10.240.30.93:9527/repository/maven-releases/</url>
        </repository>
        <snapshotRepository>
            <id>nexus</id>
            <name>Nexus Snapshot Repository</name>
            <url>http://10.240.30.93:9527/repository/maven-snapshots/</url>
        </snapshotRepository>
    </distributionManagement>

</project>
2
3
4
5
6
7
8
9
10
11
12
13
14
15
16
17
18
19
20
21
22
23
24
25
26
27
28
29
30
31
32
33
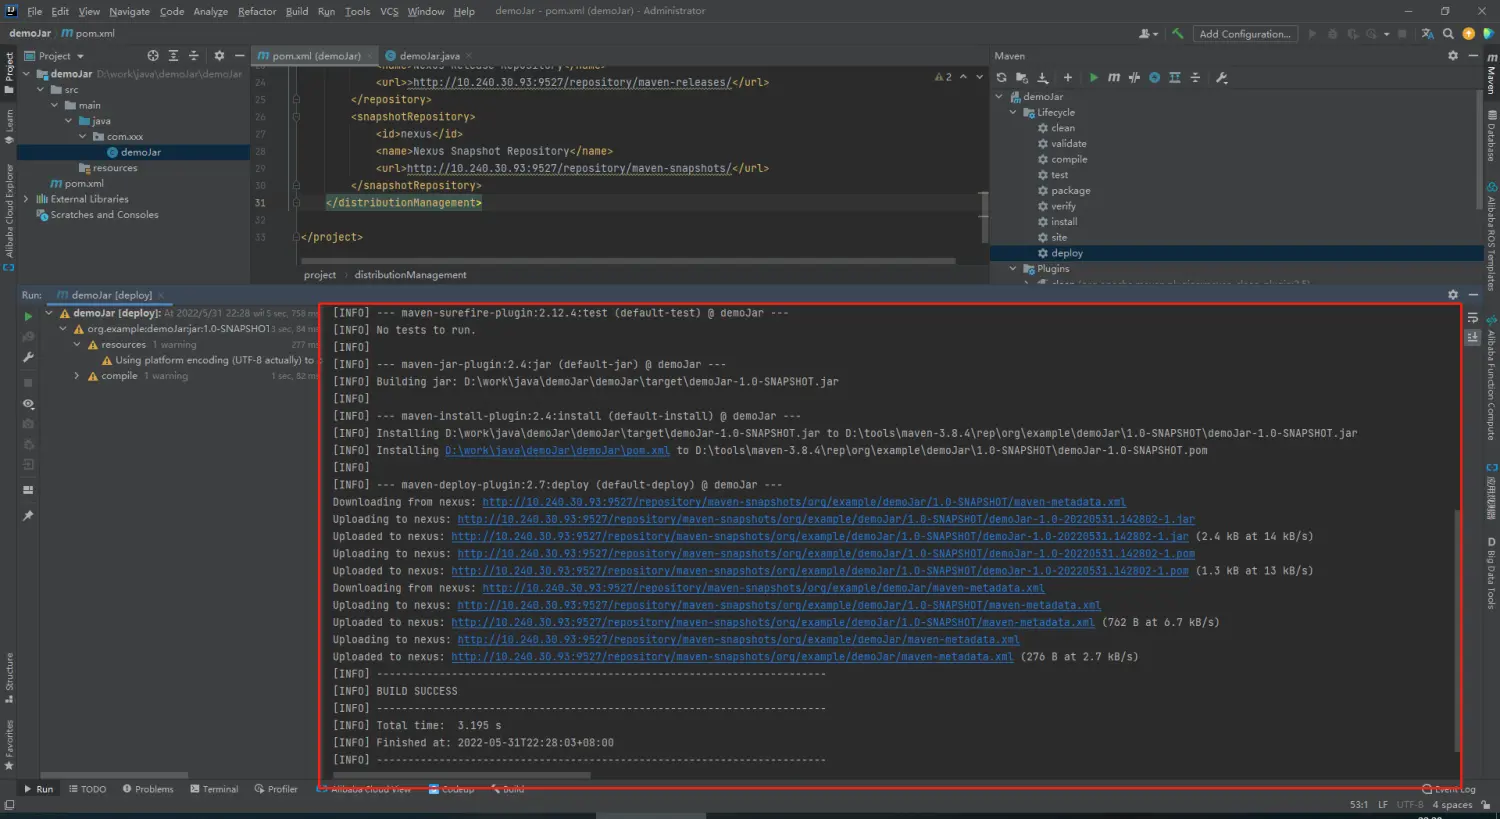
配置完成后,写好的你的工具类,然后对其进行 maven 包的发布
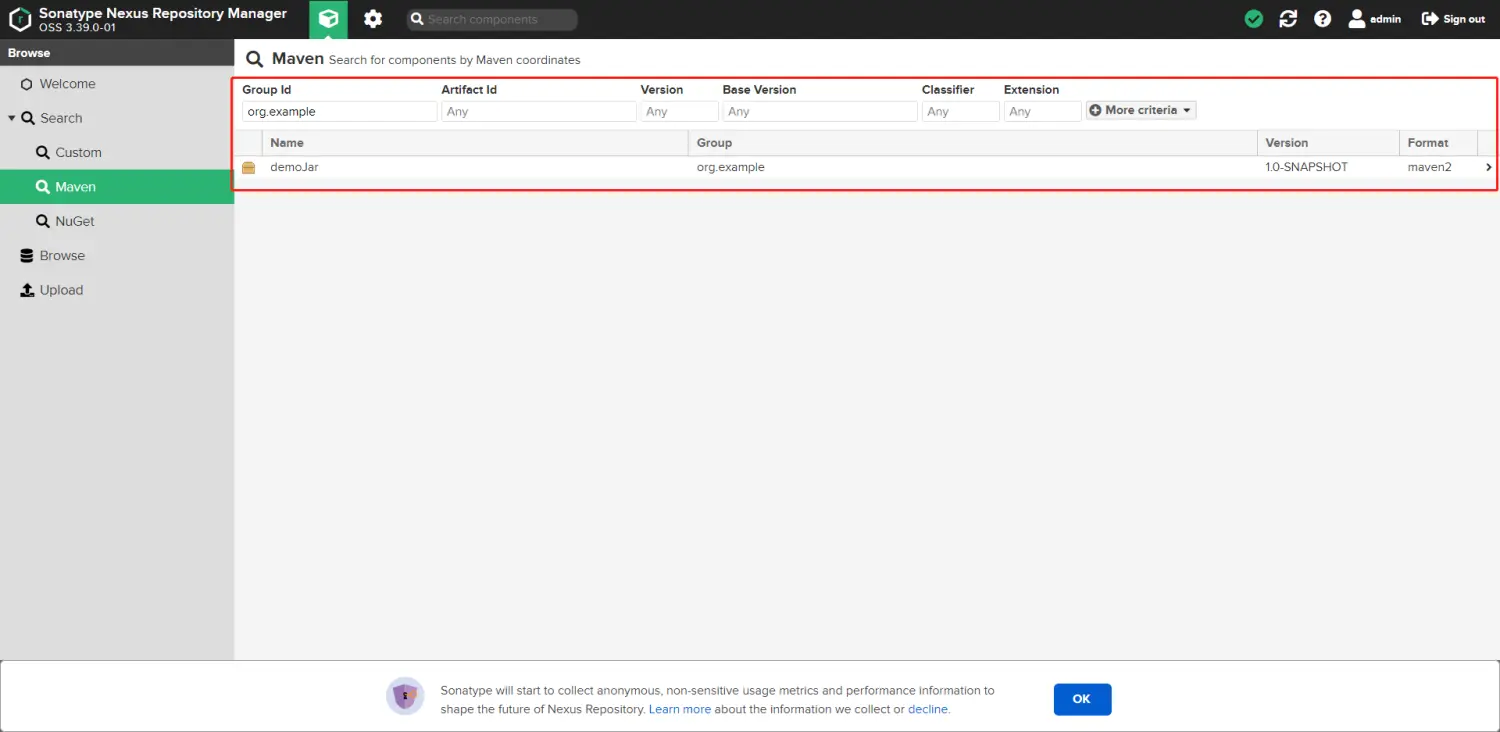
然后让你的同事进行依赖引入,就可以调用你的方法了。
<dependency>
    <groupId>org.example</groupId>
    <artifactId>demoJar</artifactId>
    <version>1.0-SNAPSHOT</version>
</dependency>
2
3
4
5
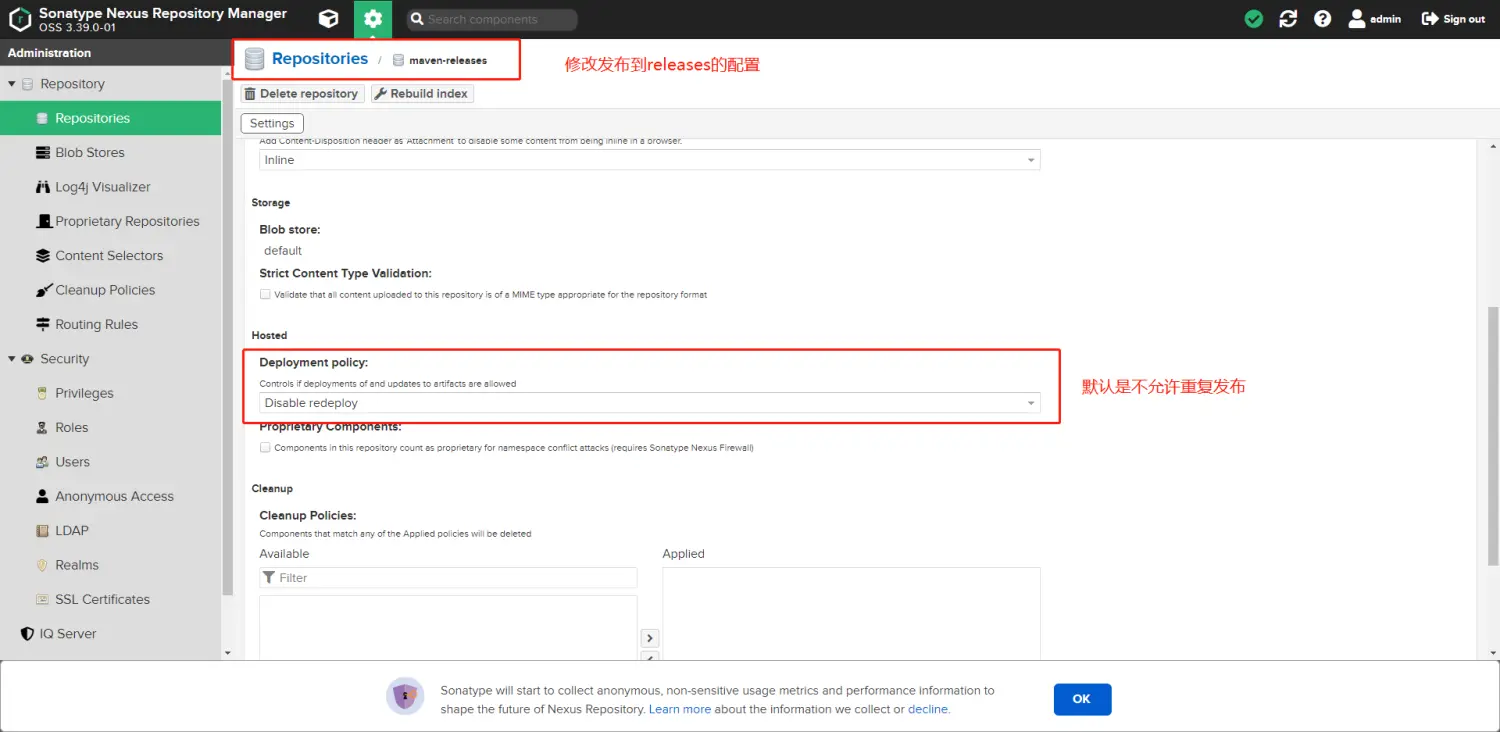
相同版本的 jar 默认是不能重复发布到 nexus 中的,可以修改你要发布地址的配置,改为 Allow redeploy
如果发现自己上传的包,确定无误后无法下载依赖,不管是自己还是别人,那么可能原因是 Maven 内置的插件远程仓库配置,关闭了对 SNAPSHOT 的支持,防止不稳定的构建。所以解决办法最关键的是:在 maven 的 conf 目录下的 setting.xml 文件中,添加 对 SNAPSHOT 的支持
<snapshots>
  <enabled>true</enabled>
</snapshots>
2
3
在你 maven setting.xml 里加,或者 pom.xml 里加都行
<profiles>
    <profile>
        <id>central-repo</id>
        <repositories>
            <repository>
                <id>central</id>
                <name>Central-repo</name>
                <url>http://******/central</url>
                <releases>
                    <enabled>true</enabled>
                </releases>
                <snapshots>
                    <enabled>true</enabled>
                </snapshots>
            </repository>
        </repositories>
    </profile>
</profiles>

<activeProfiles>
    <activeProfile>central-repo</activeProfile>
</activeProfiles>
2
3
4
5
6
7
8
9
10
11
12
13
14
15
16
17
18
19
20
21
22
如果需要添加两个可以是
<profile>
    <repositories>
        <repository>
            <releases>
                <enabled>true</enabled>
            </releases>
            <snapshots>
                <enabled>false</enabled>
            </snapshots>
            <id>releases</id>
            <name>release</name>
            <url>http://***********/maven-releases/</url>
        </repository>
        <repository>
            <releases>
                <enabled>false</enabled>
            </releases>
            <snapshots>
                <enabled>true</enabled>
            </snapshots>
            <id>snapshots</id>
            <name>libs-snapshot</name>
            <url>http://***************/maven-snapshots/</url>
        </repository>
    </repositories>
    <id>artifactory</id>
</profile>
2
3
4
5
6
7
8
9
10
11
12
13
14
15
16
17
18
19
20
21
22
23
24
25
26
27